

Macrame, the art of knotting and weaving string or cord to create beautiful designs, has gained a lot of attention in recent years. And for a good reason! It’s a highly versatile craft that anyone can enjoy. From bohemian wall hangings to chic plant hangers, you can learn how to macrame easily and create a variety of gorgeous home decor pieces.
One of the best things about macrame is that it can be customized to suit any style. Even beginners can create impressive works of art with just a few simple knots. So, let’s learn a bit more about why there is such a good fuss about macrame!
The Importance of Learning Basic Macrame Techniques
Learning basic macrame techniques may seem tedious at first, but it’s well worth the effort. These foundational skills will help you create clean, precise knots, and designs, which are crucial for creating more complex macrame projects down the line. It also helps you avoid common mistakes, such as uneven knots and twisted cords.
In addition, knowing the basics of macrame also allows you to add your personal touch to the projects. It gives you the creative freedom to incorporate different materials, styles, and patterns to come up with unique creations that reflect your style and personality.
So, take the time to learn the basics and get ready to explore the limitless possibilities of this amazing craft!
In this informative macrame tutorial, we will go over the four basic knots, the materials you need, how to read a macrame pattern, and how to troubleshoot common macrame mistakes.
Let’s get started and happy knotting!
What Materials Do You Need for Macrame?
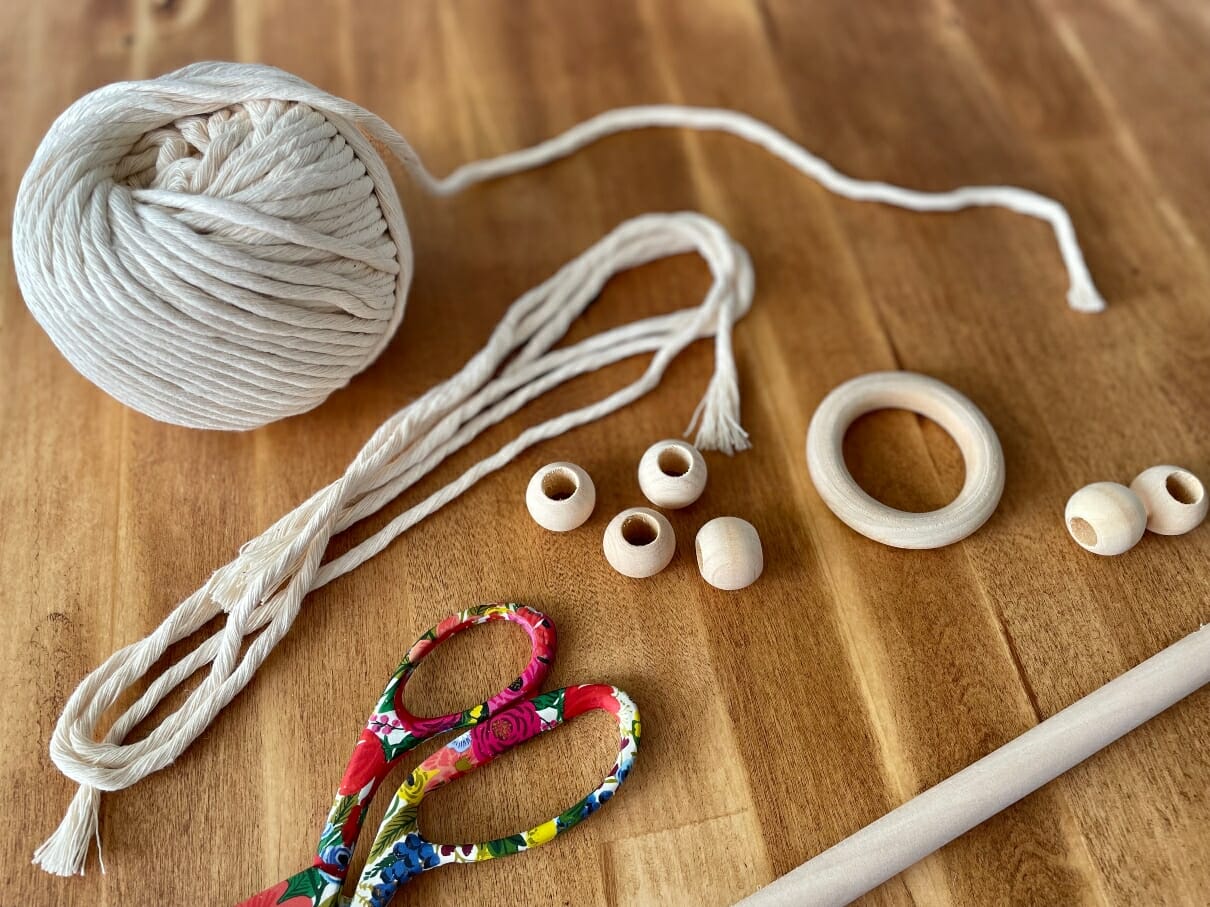
Here are the essential materials required for a basic macrame project:
- Macrame cord: Choose a sturdy and high-quality cord that suits your project’s requirements.
- Scissors: You’ll need a pair of scissors to cut the cord and trim any excess.
- Measuring tape: A measuring tape is handy for taking measurements of the cord, ensuring uniformity in your project.
- Dowel or ring: Depending on your project, you may need a wooden dowel or metal ring to hang your finished piece.
- Glue: Glue helps to keep the ends of the cords in place when tying knots.
- Comb or brush: A comb or brush is necessary for combing and brushing the cords.
Now that you have your materials ready, it’s time to get started on your basic macrame project.
Choose the Right Cords and Ropes for Your Macrame Project
There are cords and ropes of all kinds for macrame. The one you need will depend on the type of project you’re creating.
Here are 10 types macrame cords to consider for your DIY project:
1. Cotton cord – soft, flexible, and perfect for all types of knotwork;
2. Jute rope – rustic, durable, and adds texture to any design;
3. Nylon cord – strong and versatile, ideal for outdoor and heavy-duty projects;
4. Hemp twine – eco-friendly, strong, and provides a natural look;
5. Linen cord – smooth and soft, ideal for lightweight and delicate pieces;
6. Satin cord – shiny and elegant, great for jewelry and decorative items;
7. Sisal rope – rough and sturdy, adds a unique texture to designs;
8. Leather cord – adds a sophisticated and rustic touch to macrame pieces;
9. Metallic cord – perfect for adding a touch of glamor and sparkle to your creations;
10. Synthetic silk cord – silky, lightweight, and easy to handle, ideal for making dream catchers and wall hangings.
Recommended Tools and Accessories for Macrame
In addition to the listed materials above, you may want to consider some other tools and accessories that may enhance your macrame project.
- Macrame Board: A macrame board or a foam board is a handy tool to keep your work in place and to create consistent knots and patterns.
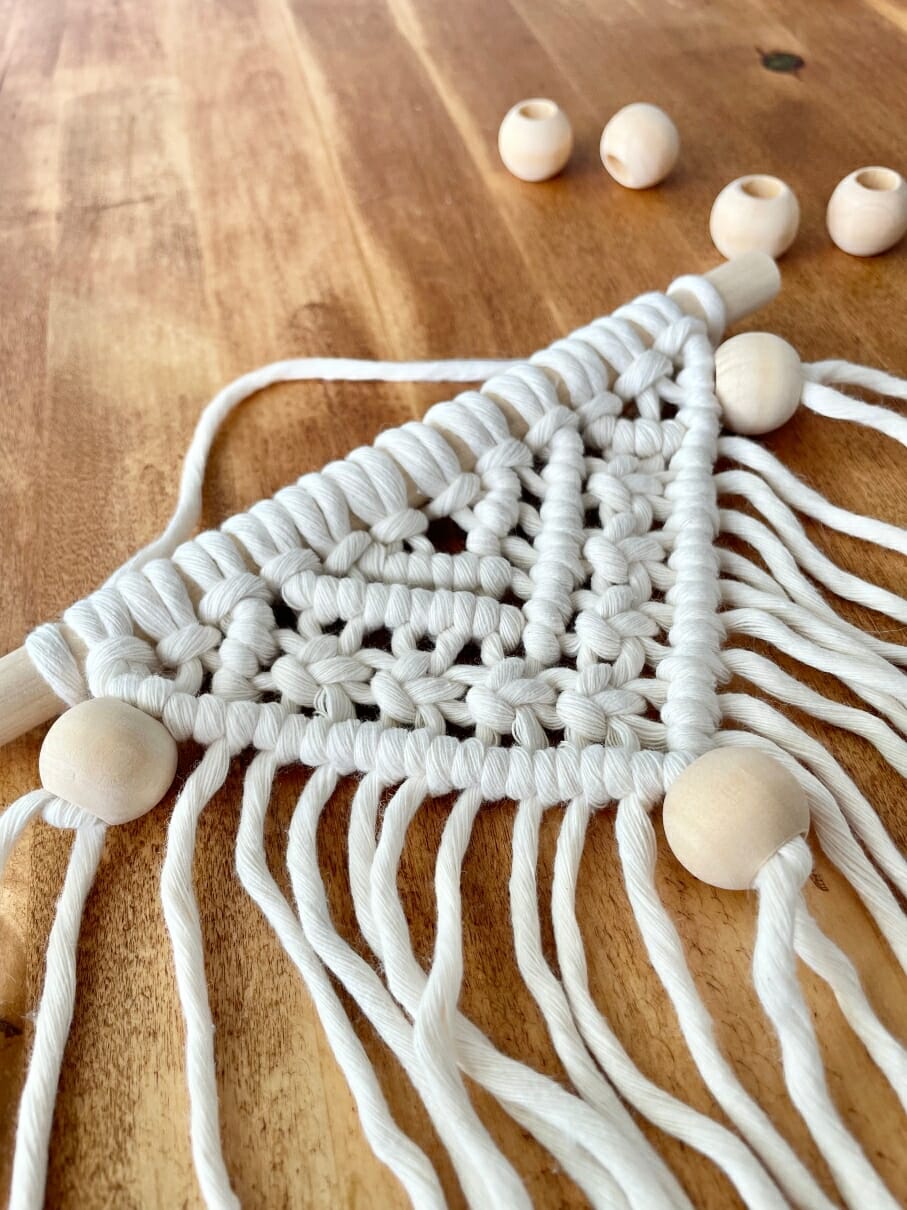
- Wooden Beads: Wooden beads add an earthy and organic touch to macrame pieces and can be incorporated into a variety of designs.
- Tapestry Needles: Tapestry needles are useful for threading your cords through tight spaces or weaving in ends.
- S-Shaped Hooks: These hooks can allow you to hang your works in progress or even your finished projects.
With these tools and accessories, you’re well on your way to creating beautiful and unique macrame pieces, so let your imagination run wild!
How to Get Started with Macrame
Macrame has become a popular hobby among DIY enthusiasts, due to its versatile use in creating unique decorative pieces. If you’re new to macrame, it’s important to understand some basic macrame terminology.
Understanding Basic Macrame Terminology
Firstly, cords that are used to create knots are called “Working Cords” (these are the active ones!). You may also see the word “sinnet”, which refers to a column of knots that are all the same.
In addition to the knots, macrame also involves “fringing” or adding tassels to the edges of your creation.
Preparing the Working Area for Your Macrame Project
The first step is to choose a clean, flat, and well-lit space. Make sure the area is big enough to hold all your materials, including your macrame cord, scissors, and any other tools you may need. Arrange them in a way that makes sense to you. You can use small jars or baskets to keep your cords organized and avoid any tangles.
Also, it’s a good idea to cover the work surface with a protective sheet to prevent any damage to your table or floor.
Lastly, make sure to sit on a comfortable chair, as macrame projects can take hours to complete. Remember to stretch and move your shoulders! Ensure that you have enough space to move your arms freely and create the intricate knots that make macrame so beautiful.
By following these simple tips, you can ensure a comfortable and organized macrame project every time.
Learn the 4 Basic Macrame Knots: Step-by-step Instructions
The basic essential knots of macrame are the lark’s head knot, the square knot, the half hitch knot, and the spiral knot.
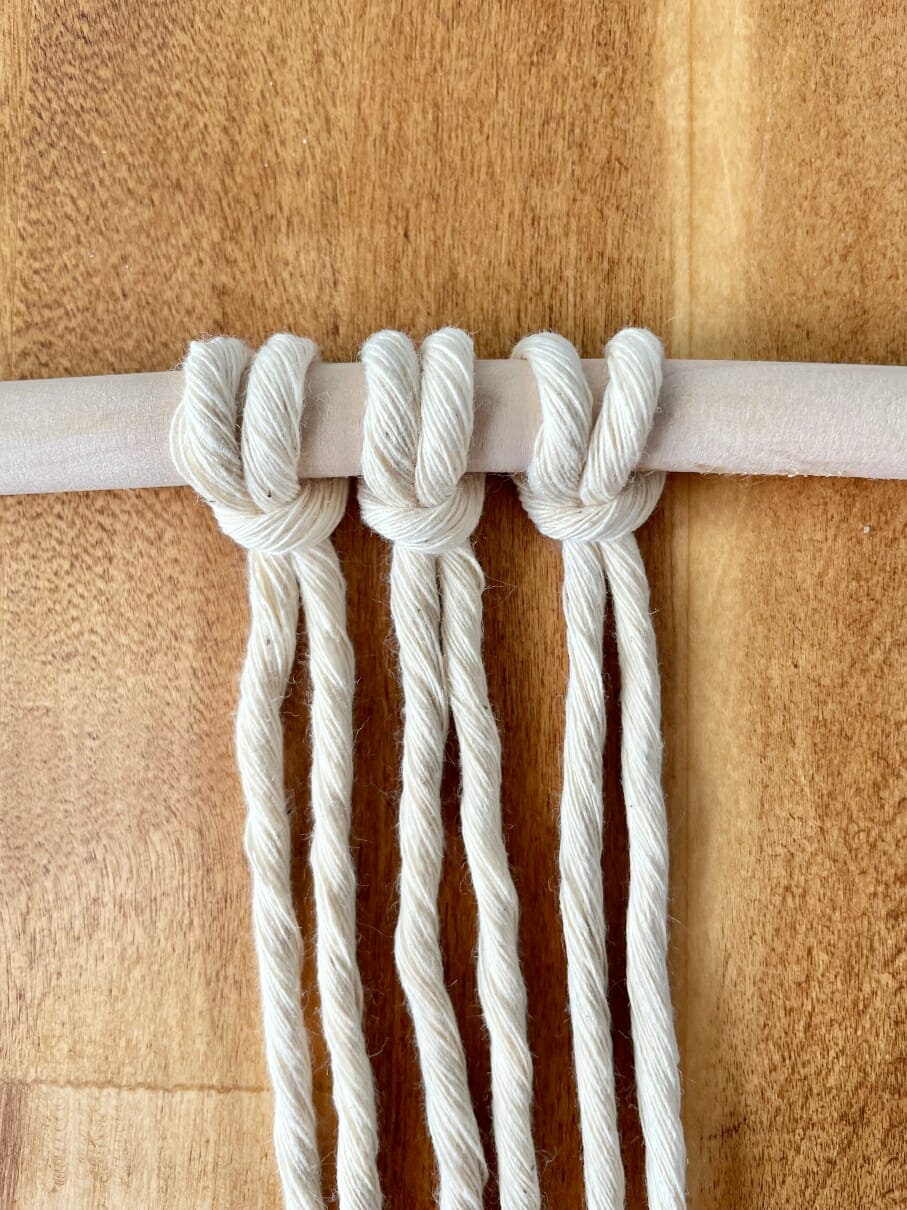
Lark’s Head Knot
Lark’s head knot is your first knot for every project. It is formed by taking a loop and threading it through, creating a simple knot. This knot is used to attach cords to a base and is often used in the creation of jewelry and decorative items.
Here’s how to make it step by step:
Step 1: Cut a length of cord in equal length, and fold it in half.
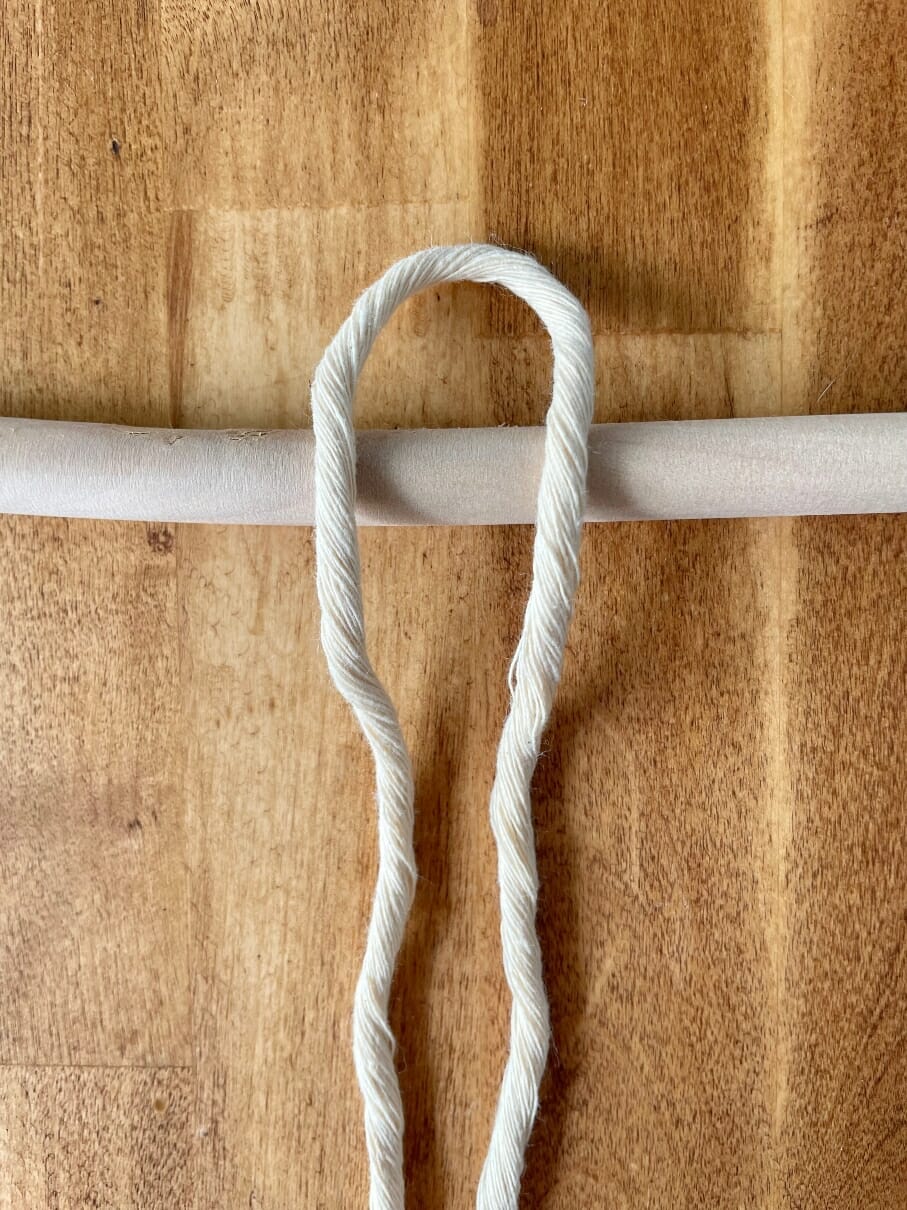
Step 2: Hold the folded cord at the center and place it over your dowel.
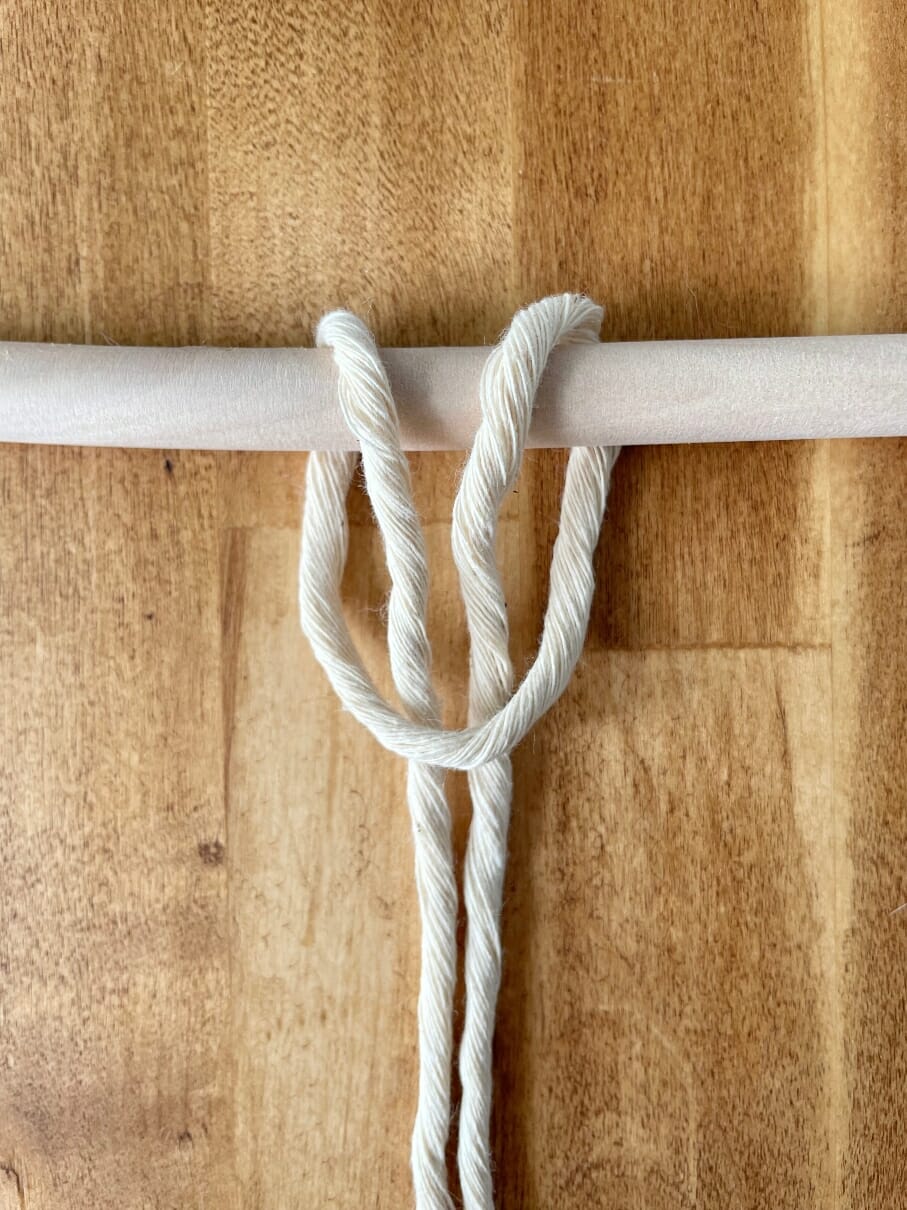
Step 3: Pull both cord strands through the loop you have created with your dowel so it attaches to the dowel. Tighten.
Practice Tip: To practice the lark’s head knot, cut a piece of cord and practice attaching it to different objects using the lark’s head knot.
Square knot
The square knot is formed by taking two cords and knotting them in a square pattern. This knot is often used as a foundation for other knots and is essential in making plant hangers, wall hangings, and other decorative items.
Here are the steps to create a square knot:
Step 1: Cut two long strands of cord that your project requires.
Step 2: Fold both strands of cords in half and create a Lark’s Head Knot with each on your dowel.
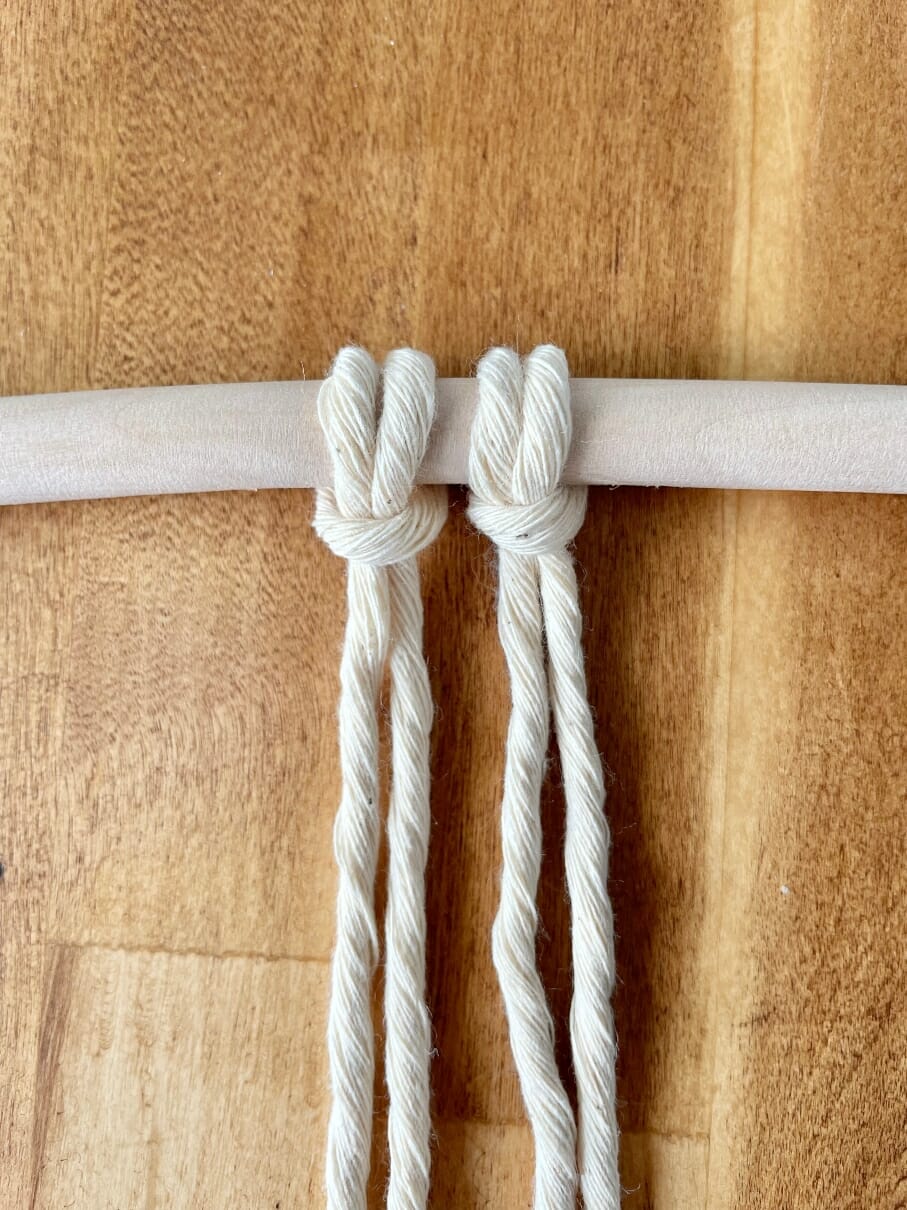
Step 3: Now you should have four strands of cords in front of you.
Step 4: Take the first left outer cord (aka Working Cord #1) and cross it over the two middle cords and underneath the right outer cord.
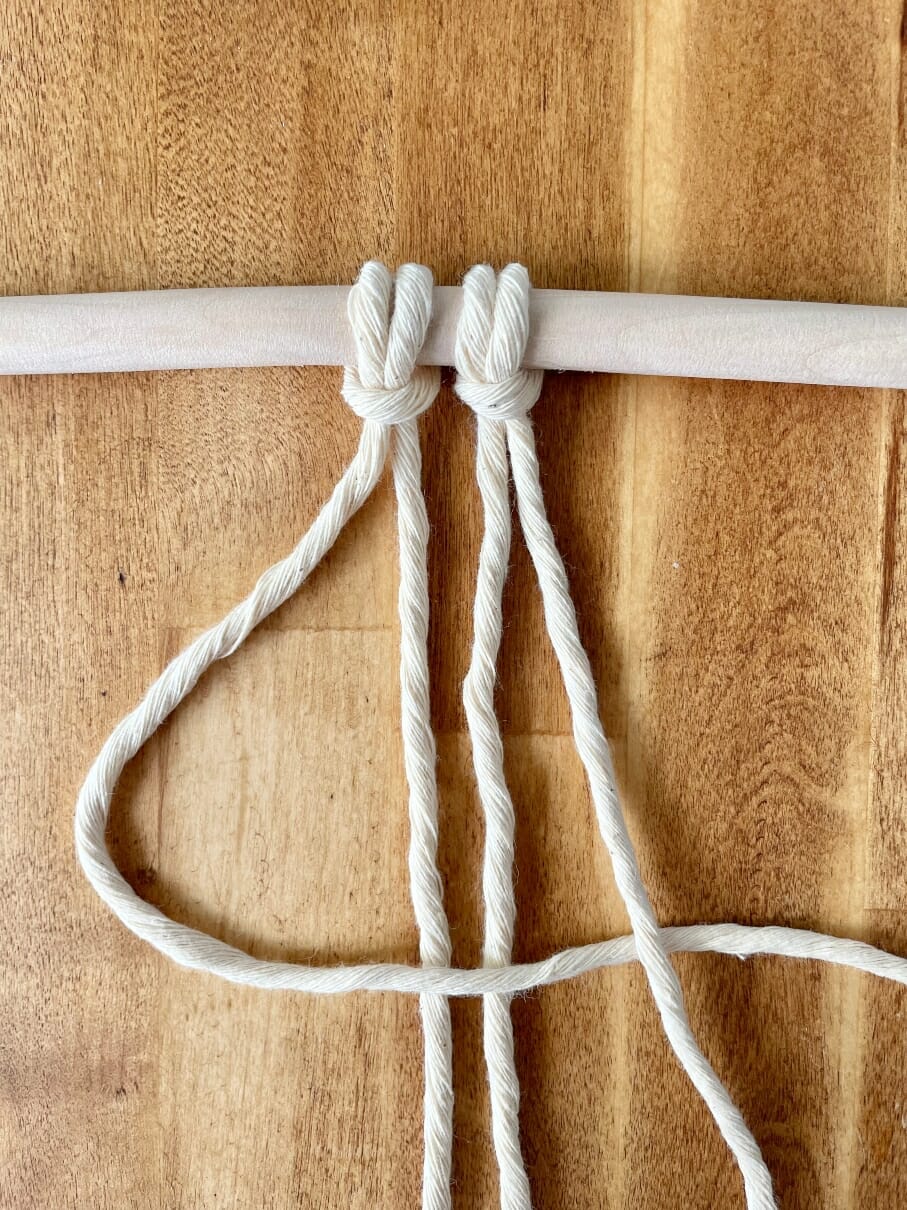
Step 5: Take the right outer cord (aka Working Cord #4) and cross it over the two middle cords and over Working Cord #1.
Step 6: Pull both working cords tight until you’ve reached the dowel, keeping your middle cords straight and tight as you knot.
Step 7: Now you have completed half of the square knot. Working Cord #1 should now be on the right and #4 should be on the left.
Step 8: Take Working Cord #1 and pass it left over the middle cords and place it under Working Cord #4. Take Working Cord #4 and pass it right over the middle cords and place it over Working Cord #1.
Step 9: Tighten the knot by pulling on #1 and #4 gently and keeping your middle cords tight.
Step 10: Repeat this process and continue creating rows of square knots until you reach your desired length.
Practice Tip: To practice the square knot, cut two pieces of cord and tie them onto a sturdy object. Then, create a series of square knots, making sure to keep your tension consistent and your knots even.
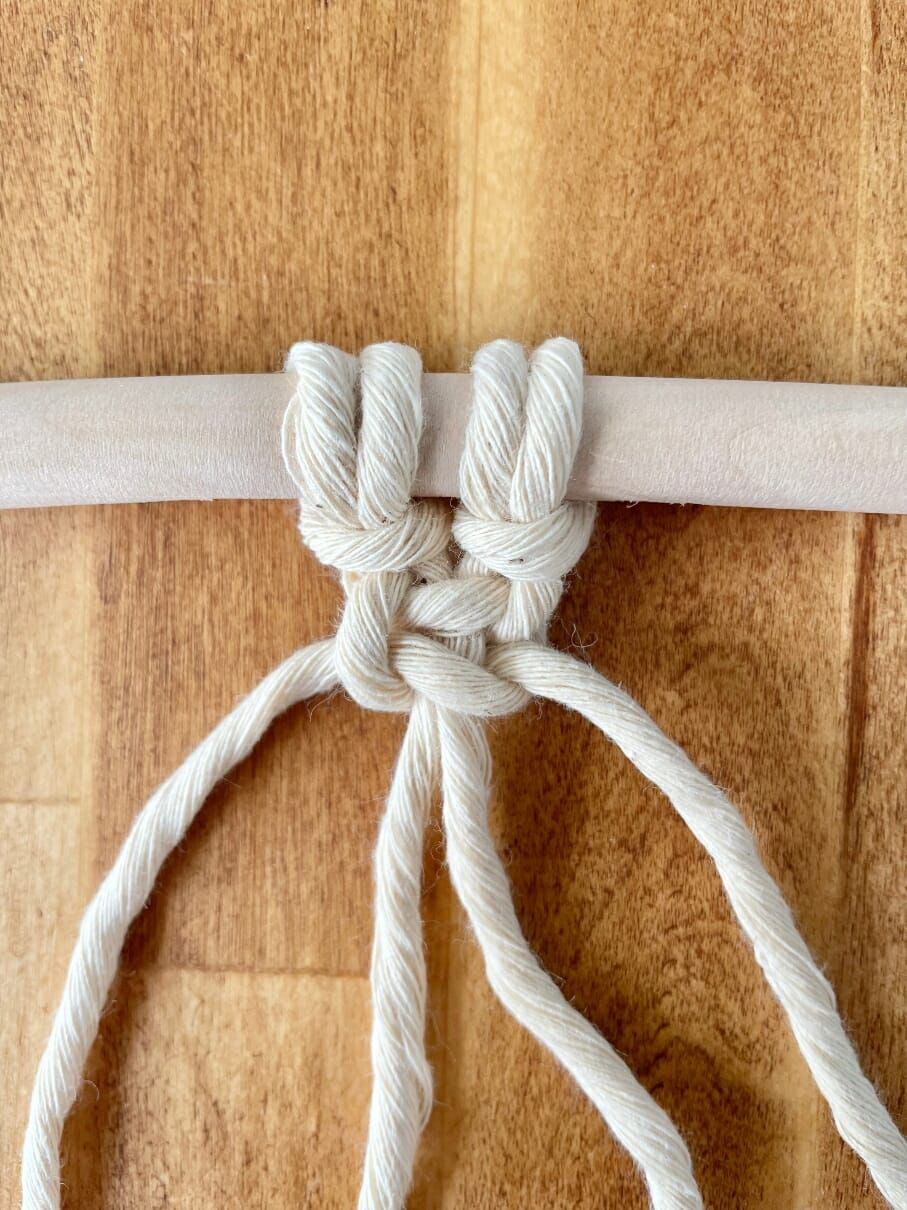
Half Hitch Knot
The half hitch knot is formed by wrapping a cord around another cord and pulling it through the loop. This knot is used to create linear patterns and designs. It is often used to make friendship bracelets and anklets, as well as wall hangings and plant holders.
Here’s how to make a half hitch knot for macrame:
Step 1: Cut 3 equal macrame cords to your desired length size.
Step 2: Fold all three strands of cords in half and create a Lark’s Head Knot with each on your dowel. You should have 6 cords now.
Step 3: Take the first left cord (aka Working Cord #1) and cross it to the right over the other 5 cords.
Step 4: Take the second left cord (aka Working Cord #2) and make a U shape over all the other 5 cords then pull the end under Working Cord #1. Pull tightly.
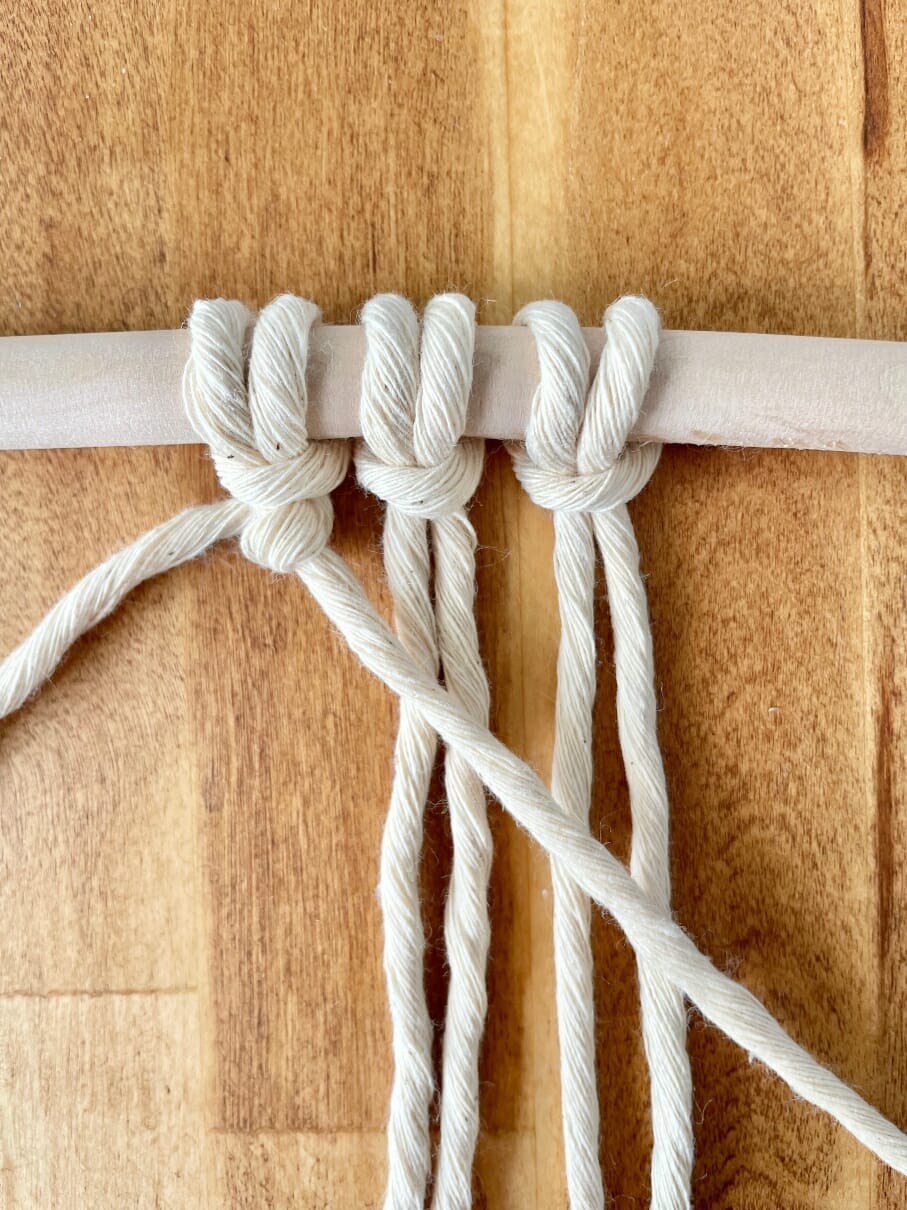
Step 5: Repeat the steps with the other cords.
Practice Tip: To practice the half hitch knot, tie three cords onto a dowel or a hanger and create a series of half hitches, varying the spacing between the knots.
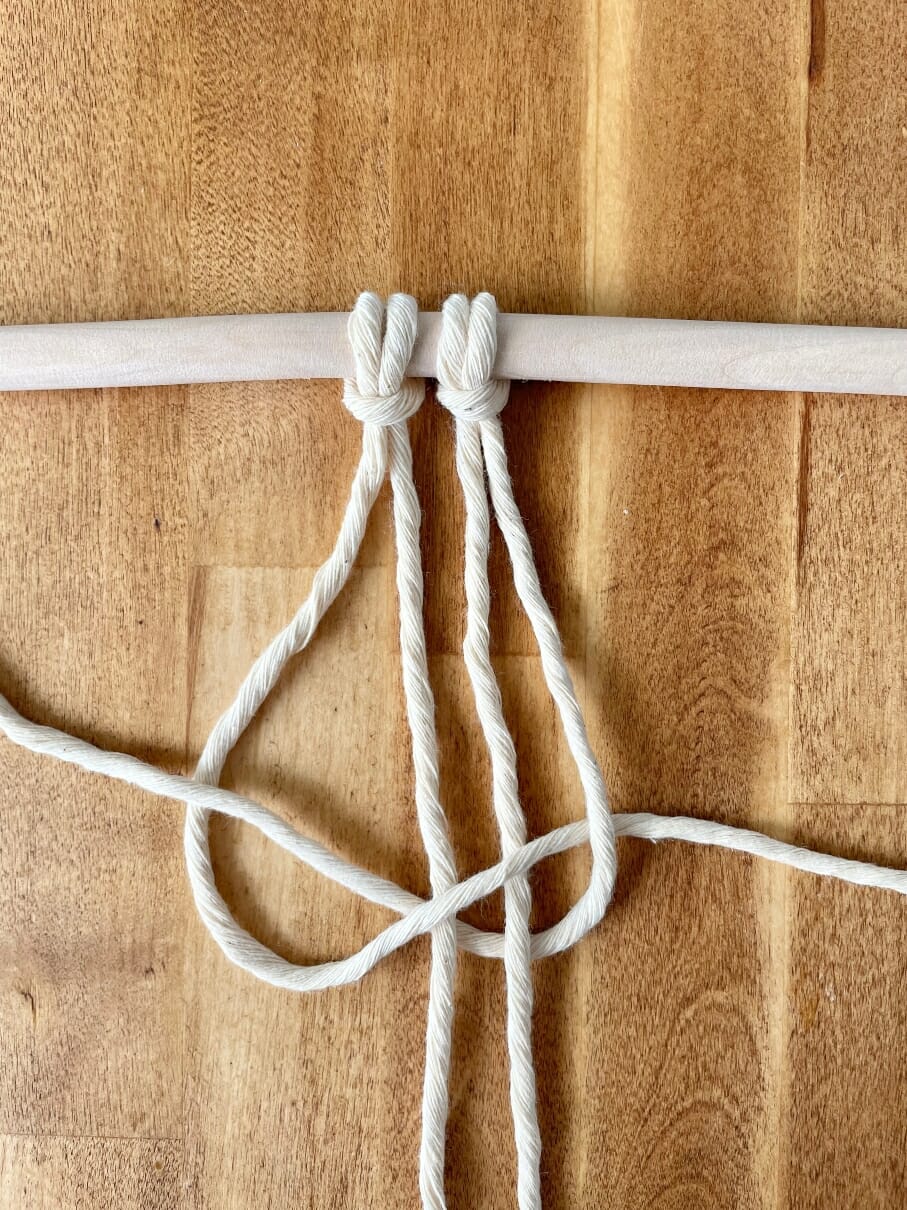
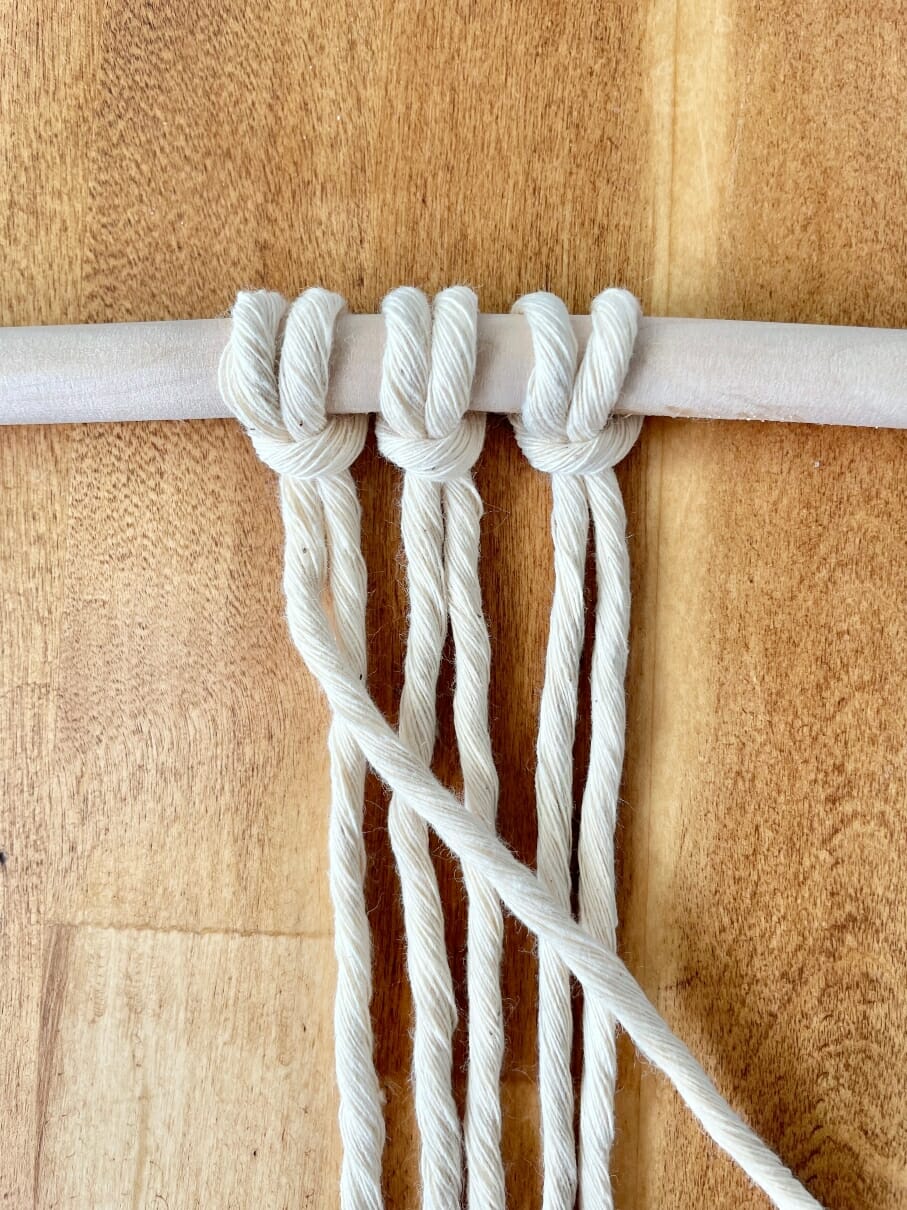
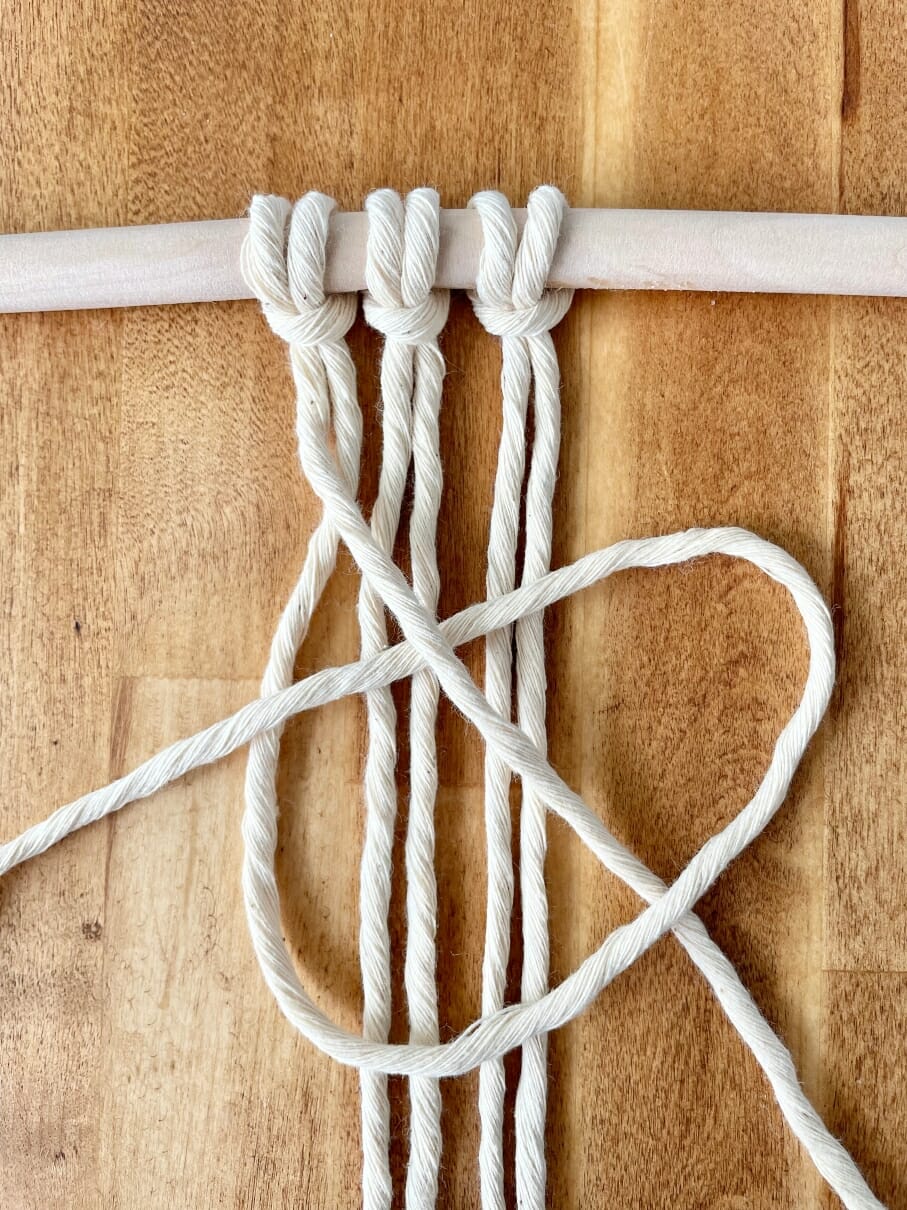
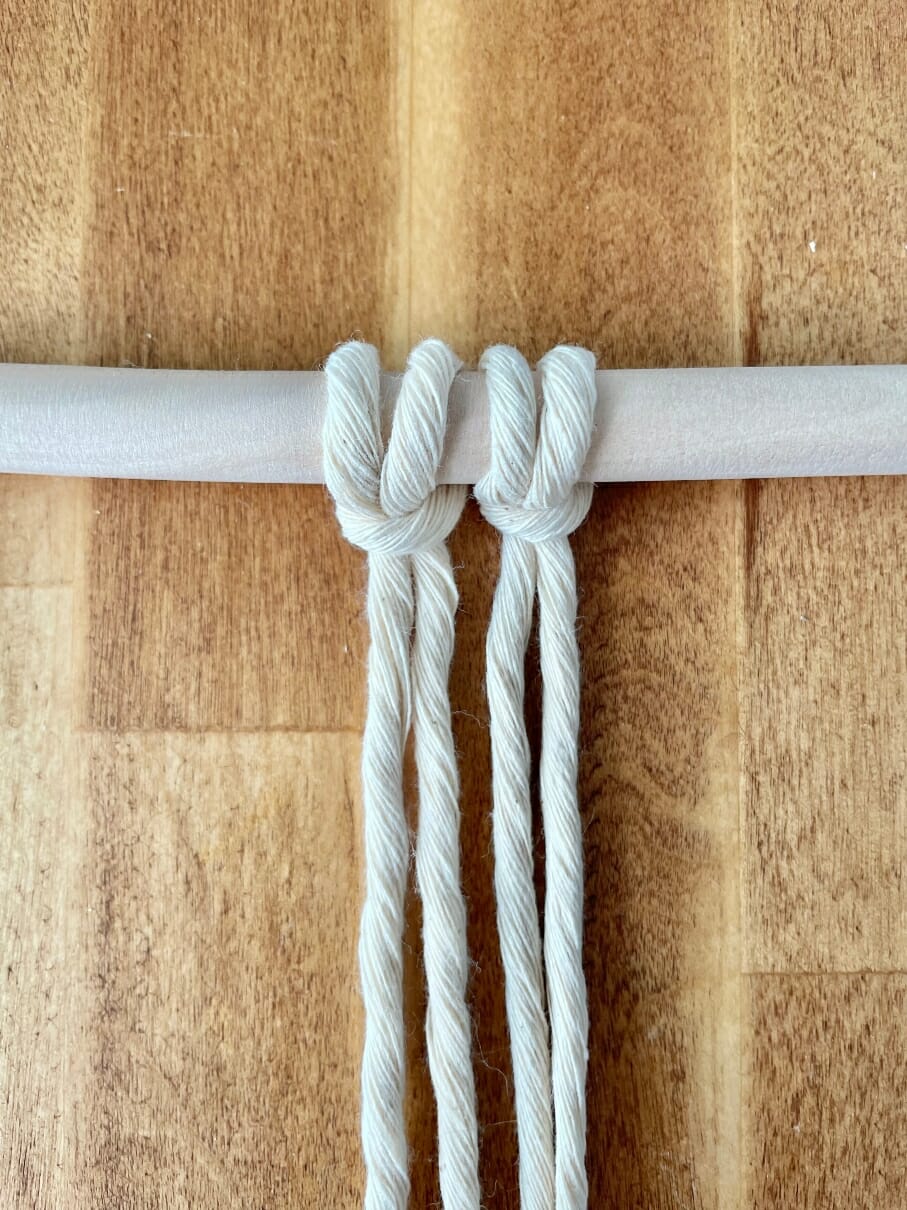
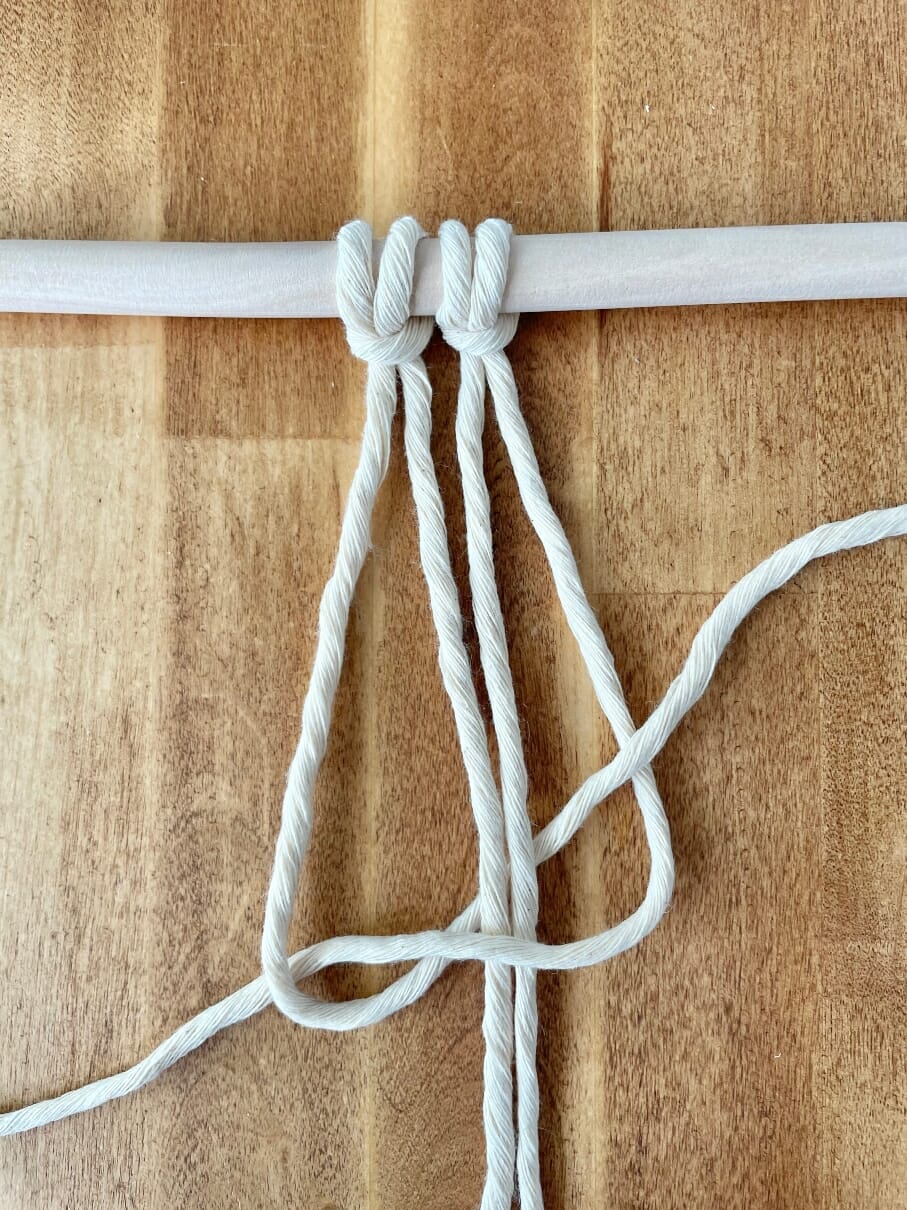
Spiral Knot
The spiral knot is formed by creating a loop with your working cord, then wrapping it around the standing cords in a spiral pattern until you reach your desired length. This knot can be used as a decorative element in wall hangings, and plant hangers, or even as a functional element in bracelets and necklaces.
Experiment with different colors, sizes, and patterns to create your unique designs! Here is how to do the spiral knot:
Step 1: Cut 2 strands of cord to your desired length.
Step 2: Fold the two strands of cords in half and create a Lark’s Head Knot with each on your dowel. You should have 4 cords now.
Step 3: Split your cords so you have two in the middle and one on each side at a diagonal. The two outer cords will be your Working Cords #1 and #4.
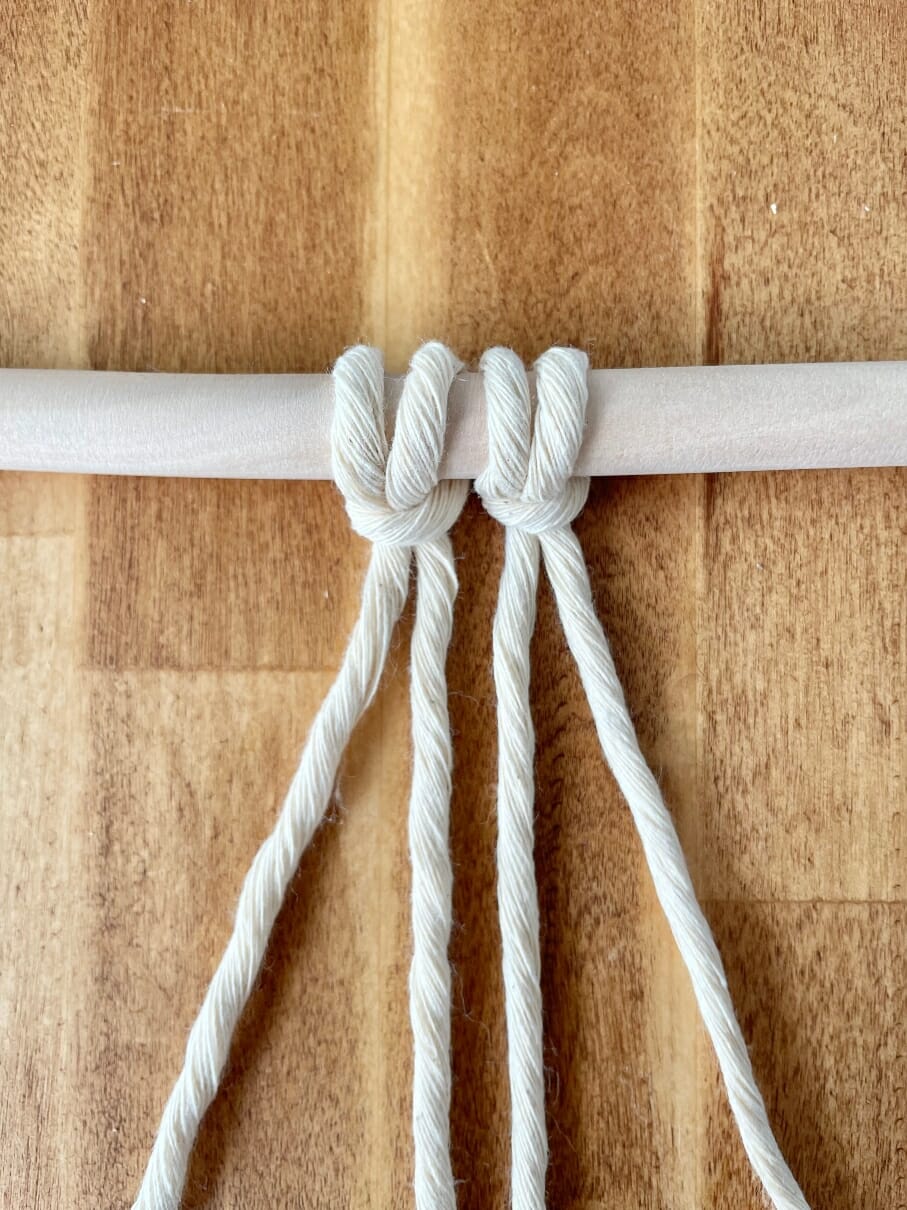
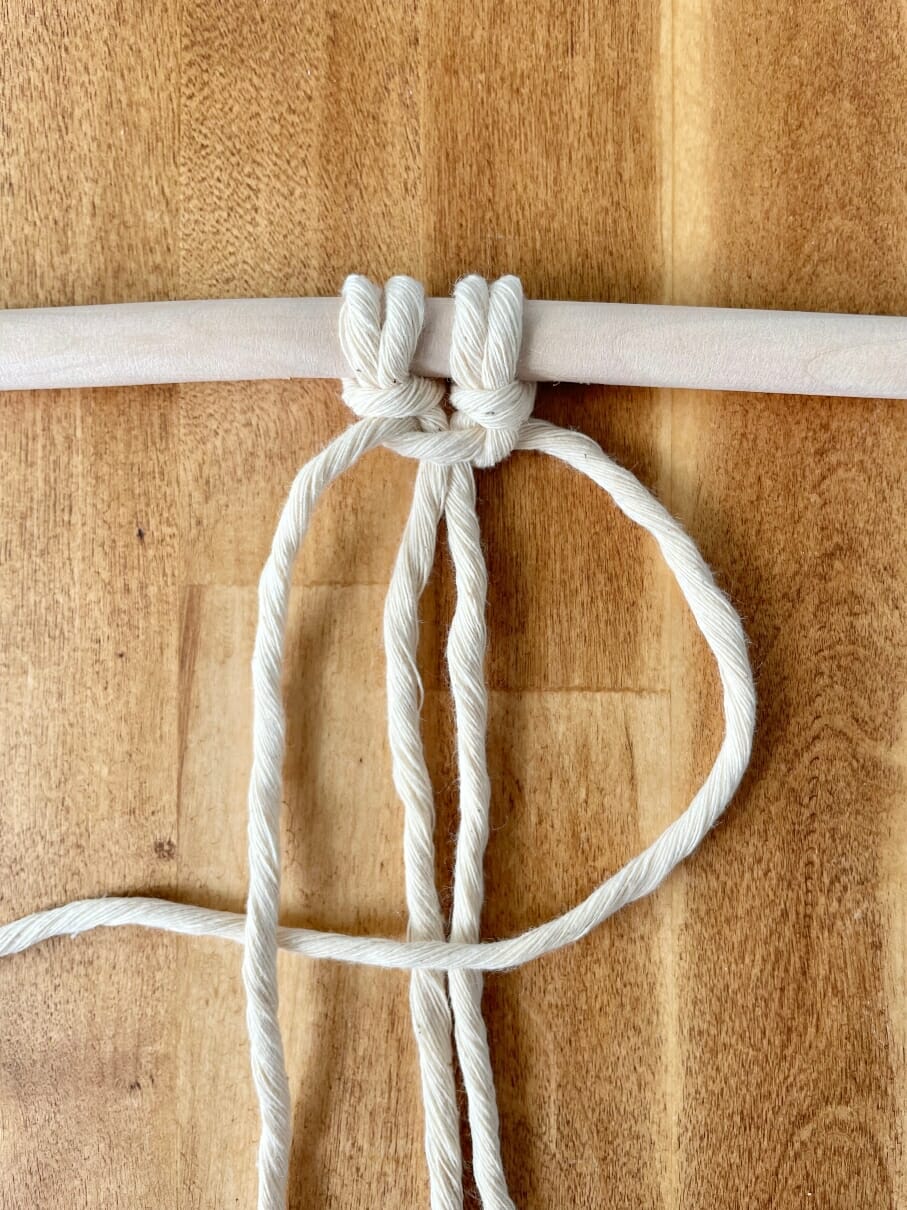
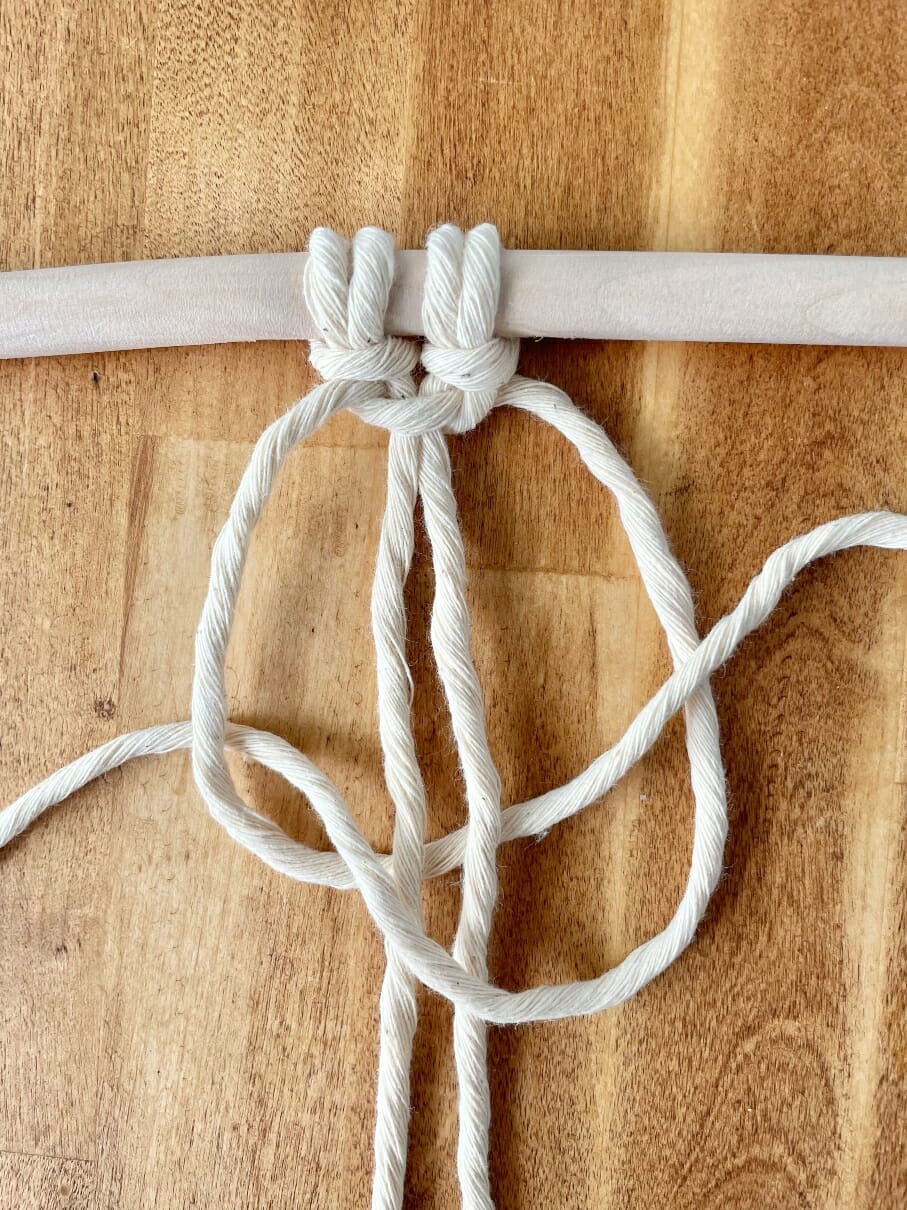
Step 4: Pinch Working Cord #4 to make the shape of a backward “4” and slide underneath Working Cord #1.
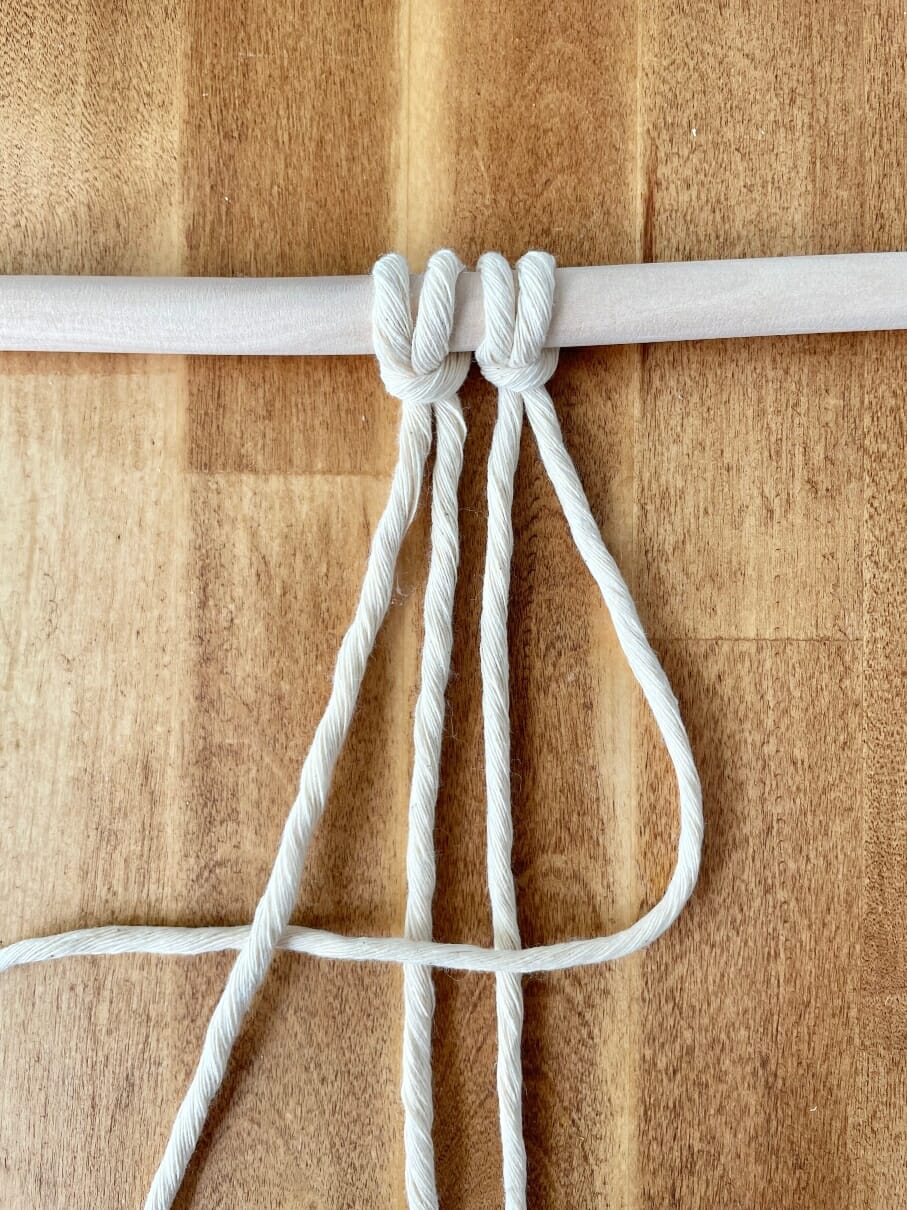
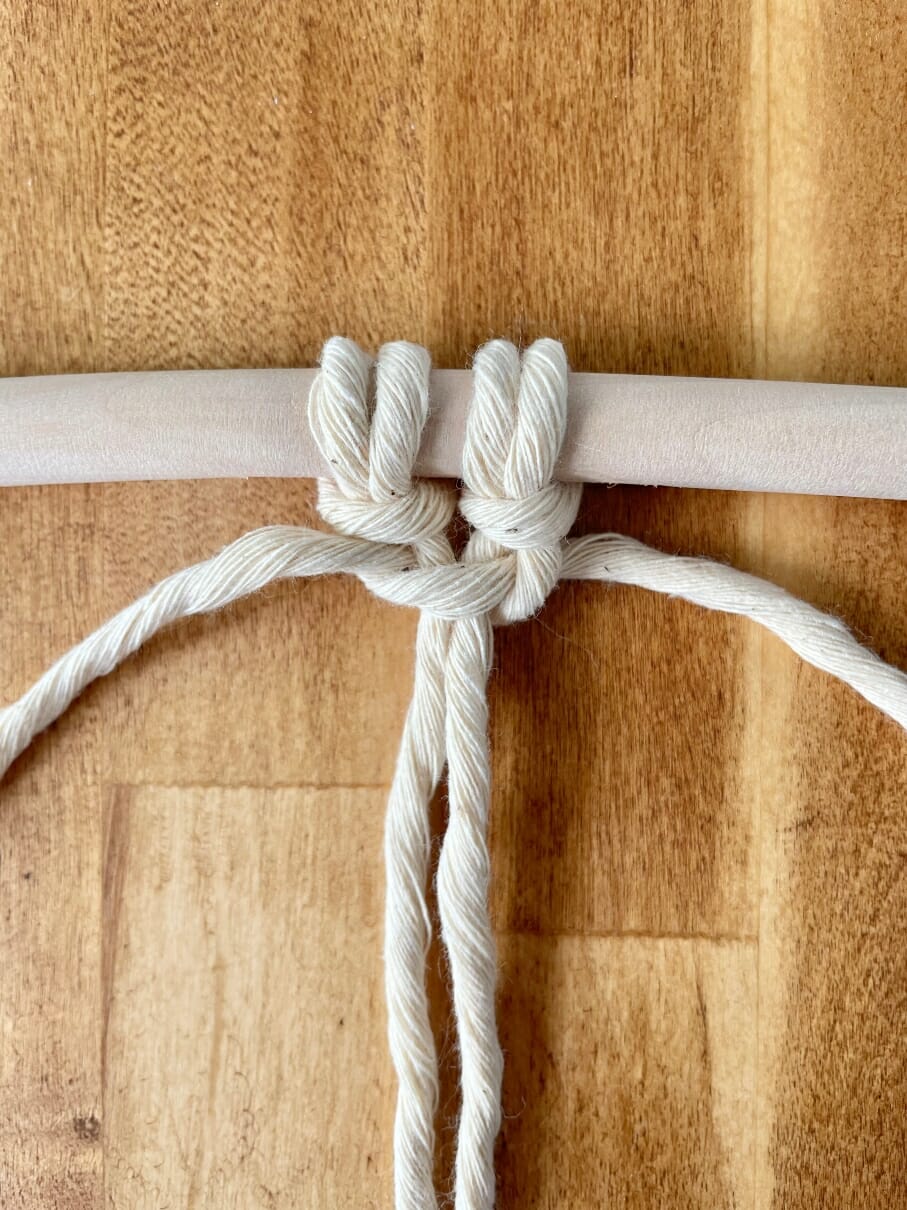
Step 5: Take Working Cord #1 and go underneath the middle cords and over Working Cord #4.
Step 6: Pull tightly until you reach the dowel, keeping your middle cords tidy and steady as you go up. As you tie this, this will create a spiral look.
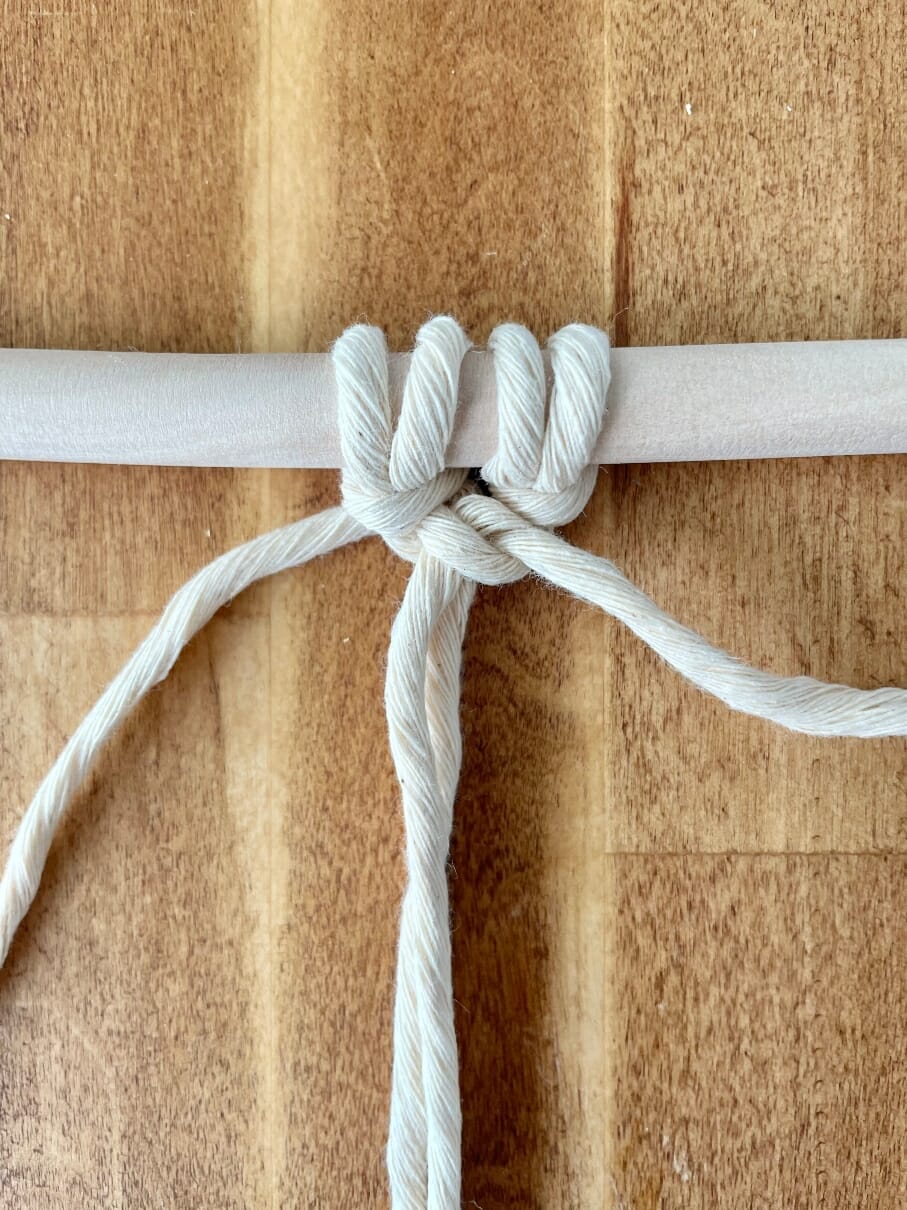
Step 7: You can keep the knots loose at the beginning to make it easier to tighten and adjust the spiral later. You can also vary the spacing between the knots to make the spiral looser or tighter.
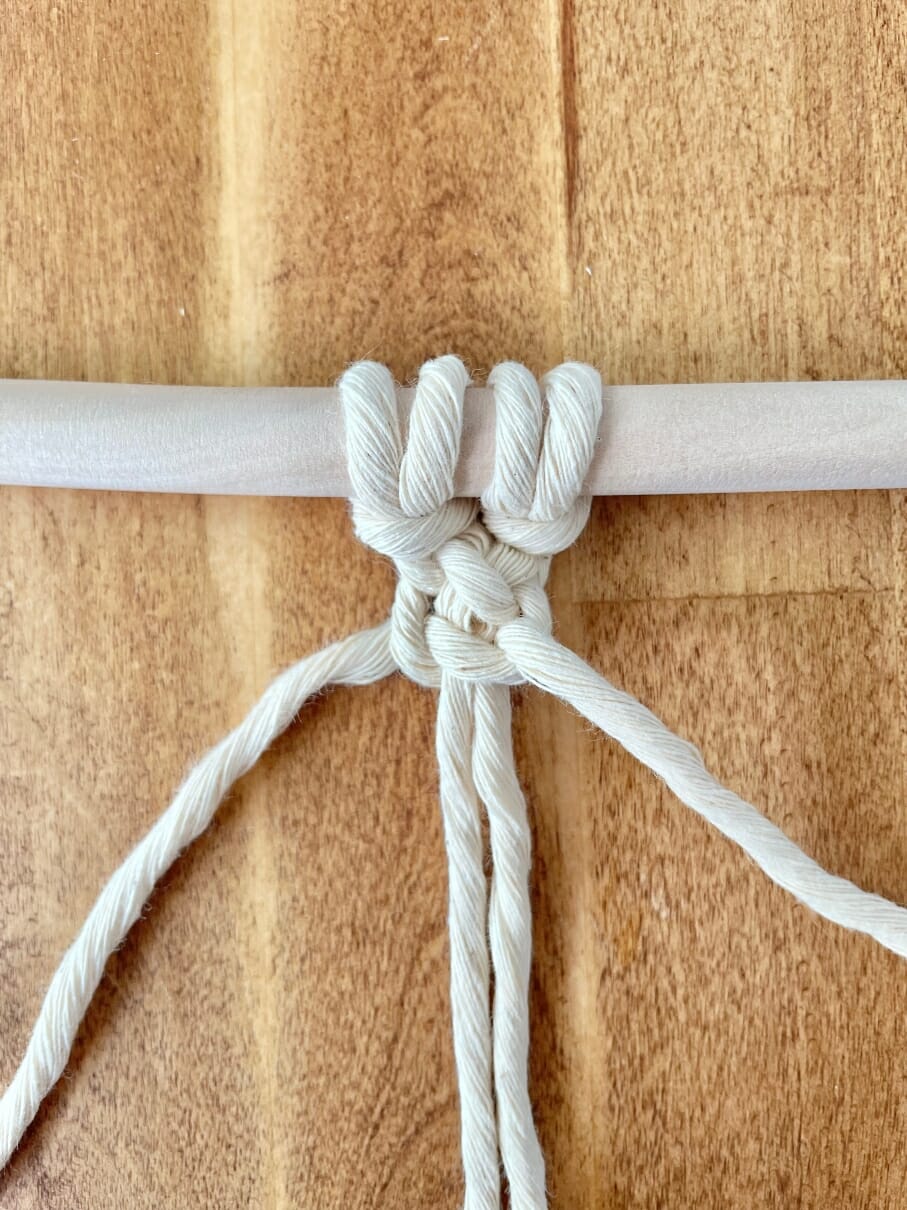
Practice Tip: Start by knotting the spiral knot slowly and deliberately. Pay attention to each step and don’t rush through it. Then, once you have the basics down, increase your speed gradually. Repetition is also important – knot the spiral knot as many times as possible to develop muscle memory.
By practicing these basic macrame knots, you can improve your technique and create beautiful and intricate macrame pieces. Remember to be patient and take your time, as mastering these knots takes practice and dedication.
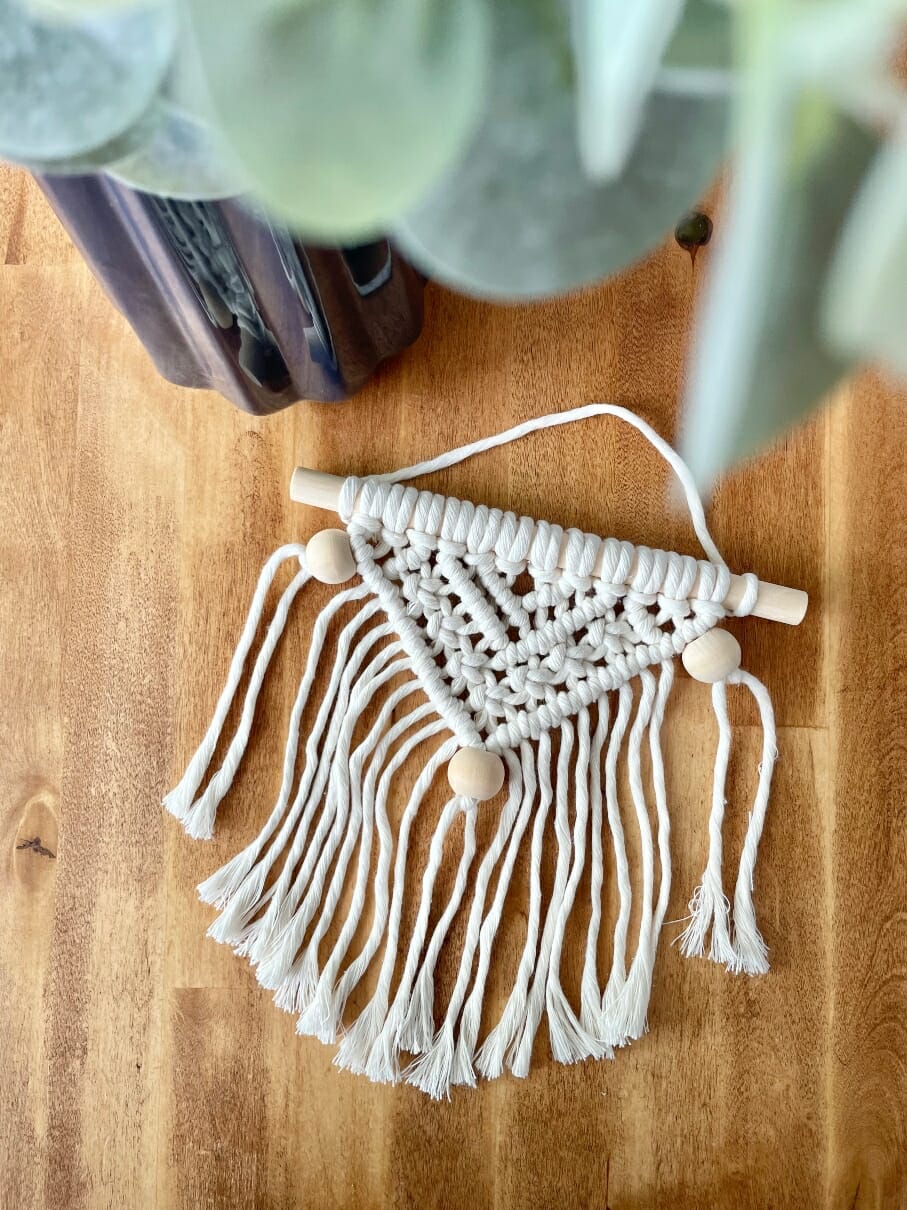
How to Macrame: Easy Macrame Project for Beginners
If you’re a beginner in macrame, it’s important to choose a project that’s both fun and manageable. With so many intricate designs out there, it can be easy to get overwhelmed.
To start, think about what types of materials and styles you enjoy working with. A simple plant hanger or wall hanging might be the perfect choice for someone just getting started, while a more intricate design like a dreamcatcher or necklace could be a fun challenge for someone with more experience.
So, be sure to choose a project that suits your skill level. Macrame involves a lot of knots and patterns, so it’s important to choose something that’s within your abilities.
Creating a Beginner-level Macrame Piece: Steps
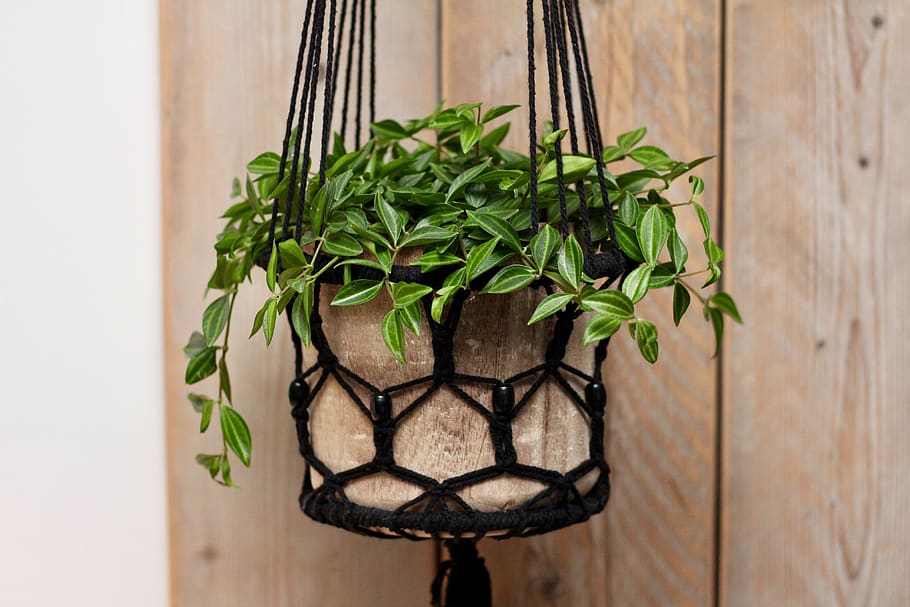
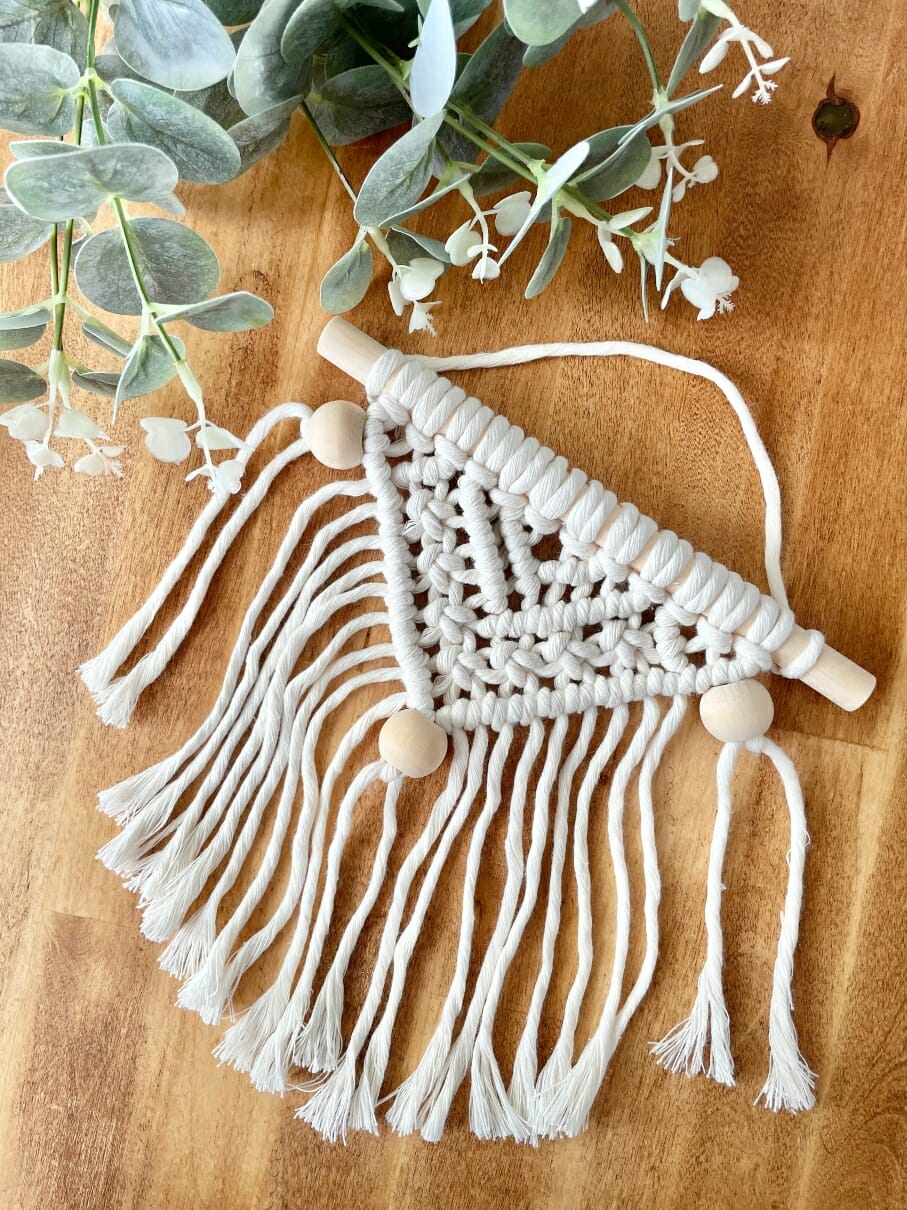
Creating a macrame piece is an excellent way to add a personal touch to your home decor. One popular beginner’s option is a macrame plant hanger.
Here are some general steps to follow:
Step 1: Select a project pattern or design to follow.
Step 2: Measure and cut your cords to the appropriate length for your project.
Step 3: Next, use a mounting technique, like the lark’s head knot, to secure your cords to your base.
Step 4: Then, you can begin executing the chosen macramé knots to create the desired pattern.
Step 5: You can also add decorative elements or embellishments to further enhance your project.
Step 6: Finally, finish off your macrame piece with a suitable ending technique like a gathering knot or fringe.
Related: 25 Free Macrame Wall Hanging Patterns & Instructions
Top Macrame Tips for Beginners
The possibilities are endless with macrame, and you’ll be amazed at the beautiful and functional creations you can make with just a few cords and some basic knots. Now, let’s explore some tips and tricks that can help you master this beautiful craft.
How to Read a Macrame Pattern
If you’re new to the world of macrame, understanding the concept of a macrame pattern may seem like an intimidating task. However, it’s actually quite simple since everything is step-by-step!
Macrame patterns are made up of different types of knots that are combined in a specific order to create a particular design. Like every other DIY tutorial, most modern-day macrame pattern instructions, you find online, are explained through step-by-step photos or videos. Be sure to review carefully and follow along at your own speed. The best part is you can always go back to where you need clarification!
Incorporate Beads or Other Materials Into Macrame Designs
One way to take your macrame designs to the next level is to incorporate beads or other materials. Here are a few tips on how to do so effectively:
1. Look for beads that are the right size for your macrame project and consider the color and texture of the beads. To create a natural, bohemian look, consider wooden beads. If you want a pop of color, opt for brightly-hued beads.
2. Next, think about where you want to incorporate the beads in your design. Beads can be used in a variety of ways – you can add them to the cords of your macrame and create patterns, or use them to add texture and interest to specific areas of your design.
3. To sum up, the first technique is to simply string the beads onto the cords before you begin your macrame project. Or you can add the beads as you work, by weaving them onto the cords using a crochet hook.
Whether you’re adding a subtle touch of elegance with a few beads or creating an intricate pattern using a variety of materials, your macrame is sure to stand out and impress.
Experiment With Different Color Combinations and Textures
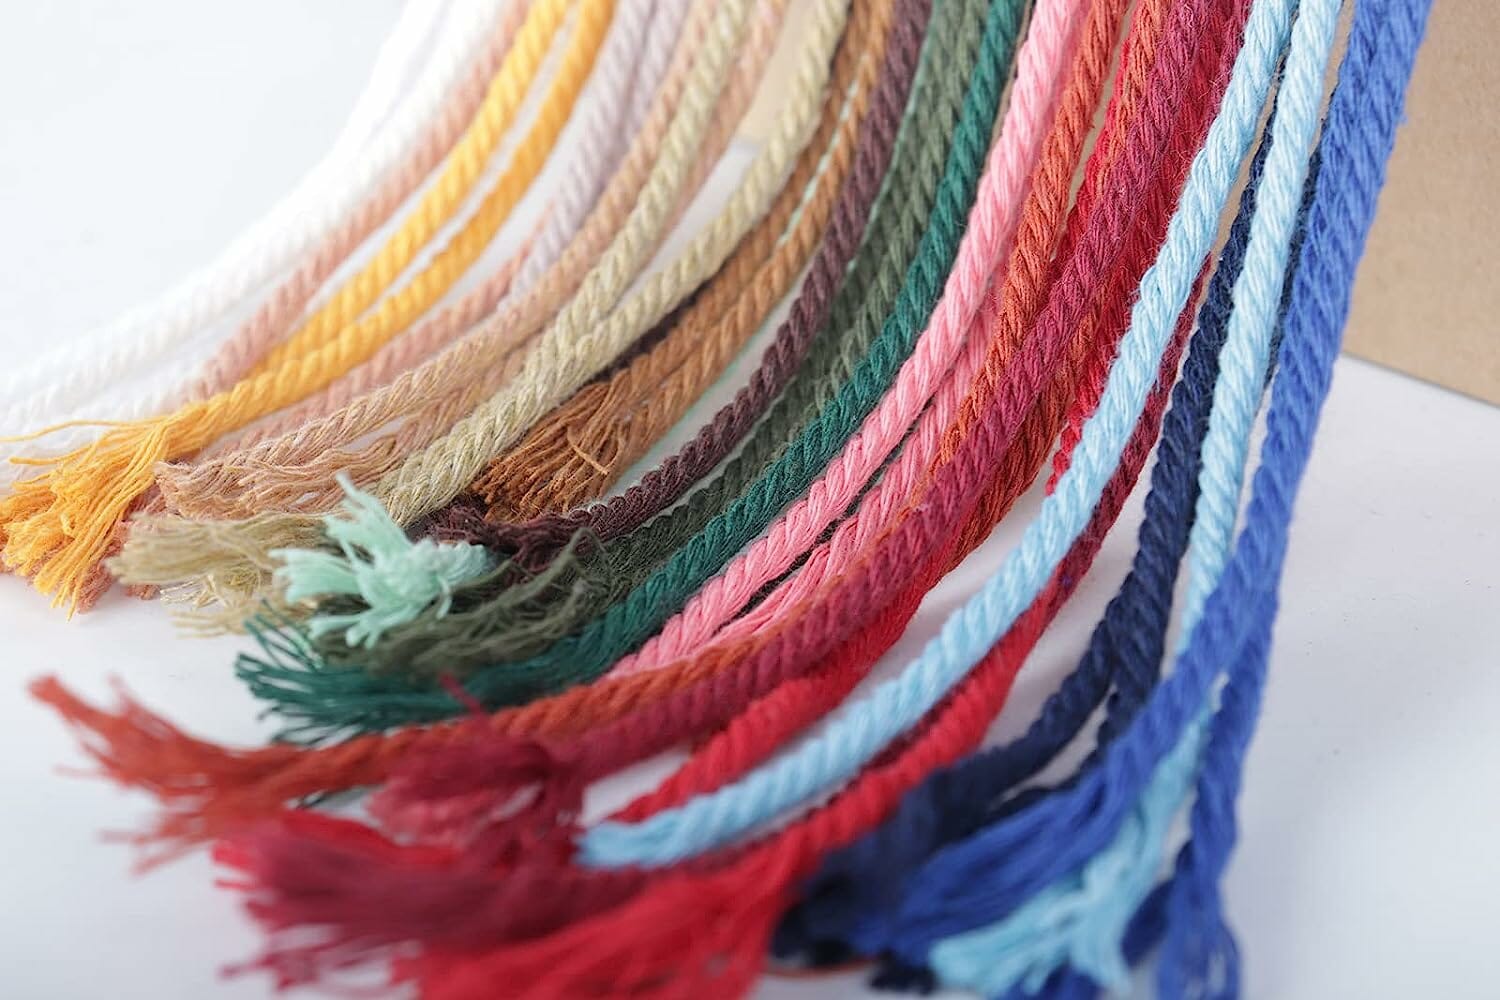
One of the best ways to experiment with macrame is to simply start with a single design, and try it in a few different colors and textures. You can also mix and match textures within the same project, using a mix of rope, cord, and other materials like fabric strips or leather.
Remember that you don’t have to stick to traditional color schemes. Consider trying unexpected combinations of colorful macrame cords, be it in green, blue, red, or neon pink.
As mentioned, another great way to play with texture is by incorporating embellishments like beads, shells, or feathers into your design. Just remember to balance the texture and colors in your project so that they work together harmoniously.
Resolving Common Macrame Issues
Like any craft, macrame comes with its fair share of troubleshooting issues, and the two most common issues are uneven tension and tangled cords.
Uneven Tension
Uneven tension occurs when your knots are tighter on one side than the other. This can be frustrating, especially when you’re working on a piece that needs to be symmetrical.
The easiest way to troubleshoot uneven tension is to slow down and be intentional with your knots. Pay close attention to your tension as you work, and make sure you’re pulling your knots in the same direction each time. If you’re still having trouble, try switching up the direction you’re knotting in to see if that makes a difference.
Tangled Cords
Tangled cords are another common issue with macrame. Nothing is more frustrating than trying to untangle a big knot in the middle of your work!
To avoid tangled cords, make sure you’re storing your materials properly when you’re not using them. Keep your cords neatly wound and secured with a clip or rubber band.
If you do find yourself with a knot, don’t panic! Carefully try to work out the tangle with your fingers. If that doesn’t work, a pair of scissors and a little bit of patience will do the trick.
Macrame is very forgiving as you can simply undo your previous knots until it looks like what you envision.
Time-saving Techniques for Larger Macrame Projects
Macrame projects of any size can be time-consuming and often require a great deal of patience. Fortunately, there are a few ways to save time when working on larger macrame projects.
Here’s how:
- Use a thicker rope or cord, as this will mean fewer knots to tie overall, and the finished product will have a beautiful, chunky texture.
- Break your project down into smaller sections, so you don’t feel overwhelmed. This will help prevent burnout and make the overall process feel much more manageable and enjoyable.
- If you find that your knots aren’t lining up correctly, try using washi tape to mark where each knot should be. This will save you time and frustration in the long run, but also give you a visual of your progress.
Related: 15 Free Macrame Curtain Patterns & Instructions
How to Macrame: Finishing Touches
If you love making macrame pieces, then learn a bit more about the finishing touches and how to display your completed macrame pattern.
Secure and Trim the Loose Ends of the Macrame Cords
Any loose macrame cord ends or strings sticking out of your work would not only look unsightly but they can also get caught in things. So how can you secure and trim those loose ends? One way is to tie them into knots. Depending on the size of your cord, you may need to use a needle or a pair of tweezers to do this. Once tied, snip off the excess cord as close to the knot as possible with sharp fabric scissors.
Another method is to use a dot of glue to secure the end in place before snipping it off. Whichever method you choose, remember to handle the cords with care to avoid damaging the knots or the surrounding fibers. This way, you can enjoy a neater, more professional-looking finished product.
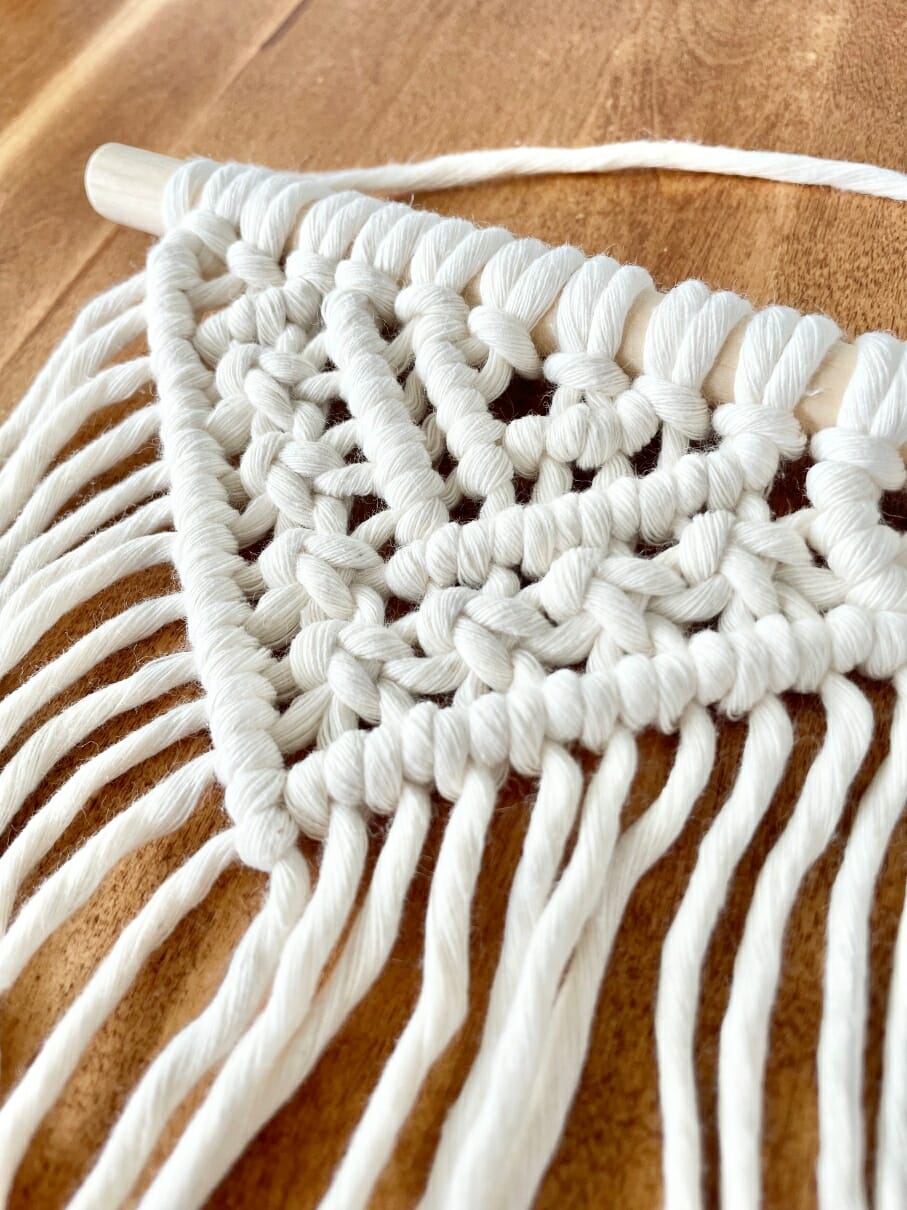
Properly Flatten the Macrame Piece
One of the biggest challenges in creating macrame pieces is ensuring that they are properly flattened and shaped. When working with textiles and natural fibers, you’re bound to get a little wonky somewhere in your project!
So, to avoid this, be sure to work with a smooth, flat surface that allows you to easily lay out your work and assess the overall shape and symmetry of your piece. Use your fingers to gently tug and adjust the cords until they lay flat and even, taking care not to pull too tightly or distort the shape of your design.
For more complex or multiple cord-thickness pieces, consider using pins or weights to help hold the shape as you work.
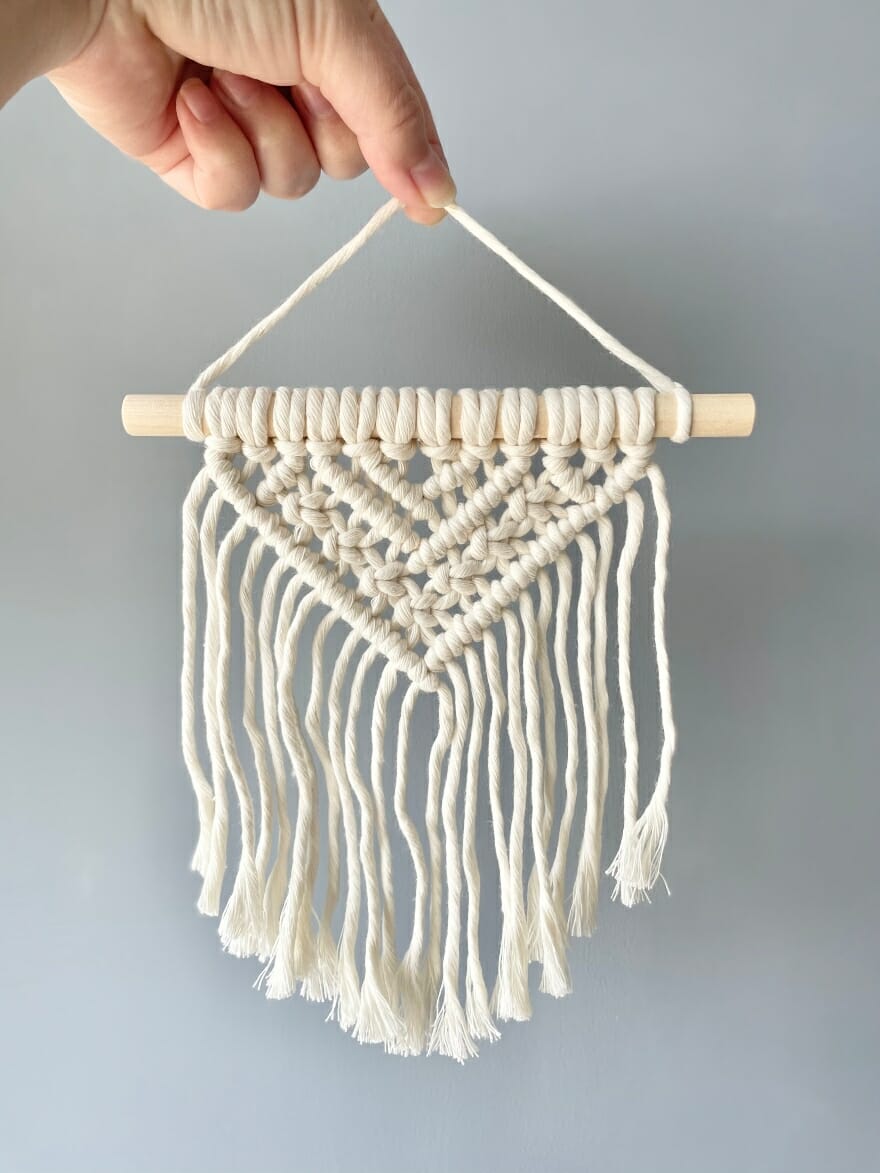
How to Display Your Finished Macrame Project
If you’ve spent hours knotting away on a beautiful macramé creation, the last thing you want is for it to go unnoticed. Here are a few ideas for displaying and showcasing your finished macrame pattern:
- Hang them on a wall: You can use a wooden dowel, a piece of driftwood, or a metal ring to hang your work. You can also group multiple pieces together for an even more impactful display.
- Make them into plant hangers: Macrame plant hangers are a popular trend and they’re a great way to display your work while adding a touch of greenery to your space.
- Display them on shelves: Use your spare shelving to showcase your macrame projects. This is a great option for larger pieces that may be too heavy to hang on a wall.
- Use them as table runners: If you’ve made a long, thin macrame piece, consider using it as a table runner. It’ll add a unique touch to your table setting.
No matter how you choose to display your macrame projects, they’re too beautiful to keep hidden away! You can always gift your friends and family with a pretty macrame piece of yours, too. Nothing is better than handmade!
Where to Buy Macrame Cord
If you’re new to the world of macrame and wondering where to buy macrame cords, the good news is that there are a lot of options available both in-store and online. From craft stores, like Michael’s and JoAnn Fabrics to popular online stores like Etsy or Amazon, you’ll be spoilt for choice when it comes to buying macrame cords in various colors and sizes.
Ultimately, the choice of where to buy a macrame cord depends on your preferences, budget, and project needs. Brick-and-mortar stores are great if you need to see and feel the cord before making a purchase, while online shops offer a wider selection and the convenience of shopping from home.
Conclusion
Macrame is an incredibly satisfying craft that has become increasingly popular over the years for home decor, wedding decor, and even fashion accessories. With my overview of this craft, you can create your very own macrame works of art that will impress your friends and family and satisfy your creative soul.
Remember that patience is key when it comes to macrame. Once you’ve mastered the basics, go beyond and experiment with different colors, textures, and techniques to create your own unique designs. So, grab your cord and get knotting! You’ll be amazed at the beautiful things you can create with this ancient art! Happy crafting!
Further Resources for Inspiration:
- Modern Macrame: 33 Stylish Projects for Your Handmade Home by Emily Katz
- Macrame: The Craft of Creative Knotting for Your Home by Fanny Zedenius
- Myfrenchtwist.com
- Liagriffith.com
- Macrameschool
The post How to Macrame: An Easy Guide for Beginners appeared first on Art & Craft, DIY ideas and Tutorials - Craftbuds.